After investigating the Z-height inaccuracy on the Elegoo Mars, and applying the official motor replacement sent to me by Elegoo (they have the best user support!) I was left with one unanswered question – what causes the last, quite small (roughly 2 %) linear error on the models’ height?
I started to measure the movement of the arm using an indicator, however, all the measurements looked good. I even measured the original screw using an optical microscope (see the raw data). It is pretty good – it features practically no jitter and only small linear error (0.2 mm/150 mm) which could be easily compensated in software.
Then I printed a large staircase (see photo below) which revealed the fact I was missing – the error is not linear. The printer prints some levels higher and some lower. The cause is in the combination of the long printing arm and the Z-rail. The Z-rail provides good guidance in the direction of the axis movement, however, it does not preserve the parallelity of the carriage and the axis. It means the carriage can “wobble a little bit” during the movent which translates into an observable difference in the Z-height on the end of the long arm (see illustration below). The reason I did not get the problem with an indicator was that I was measuring too close to the screw. My bad – there’s not plenty of places you can mount the indicator on the printer and I went with the easiest one…
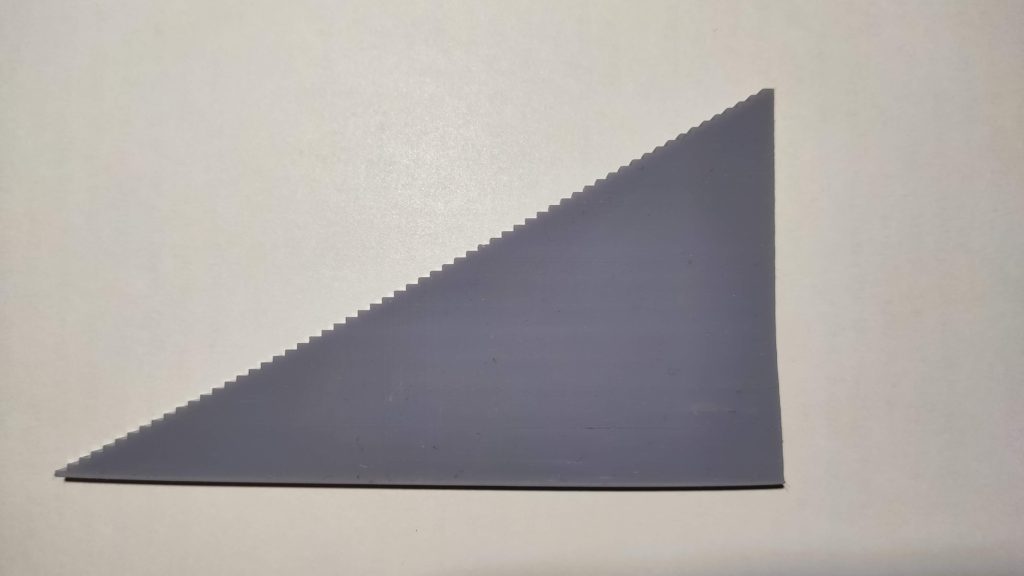
60 mm staircase
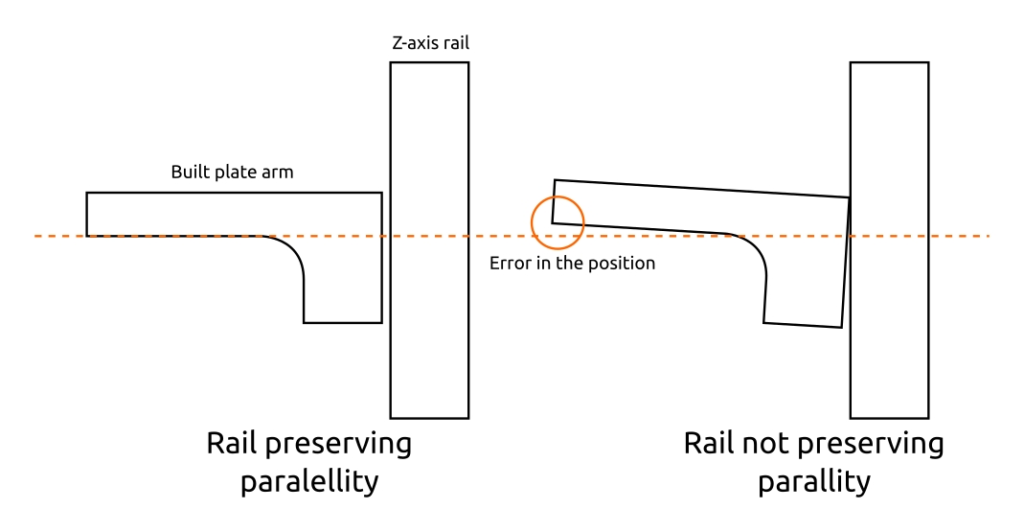
Illustration of the problem with the Z-axis rail
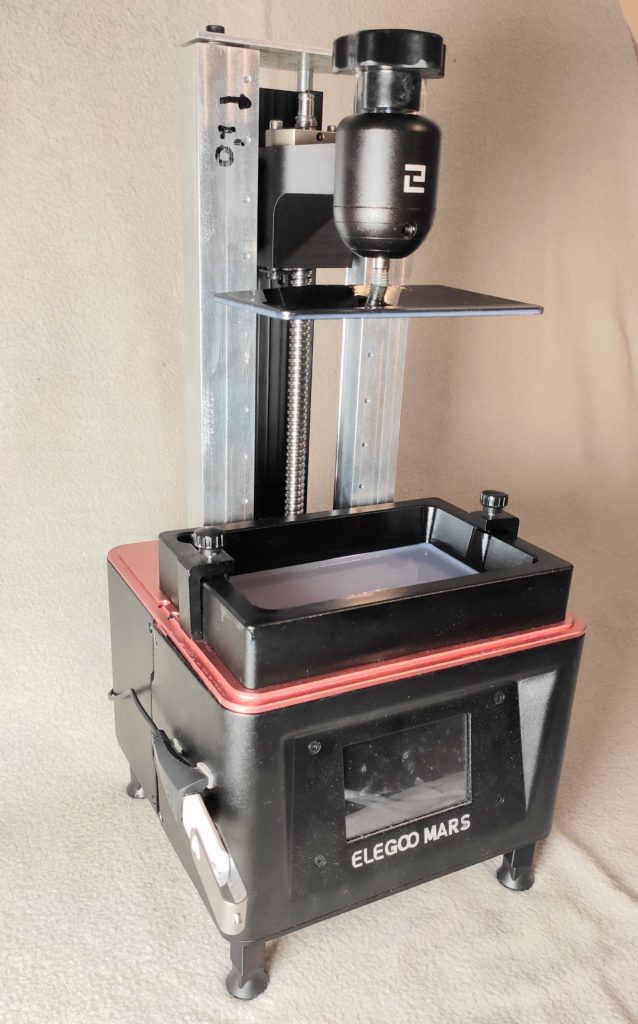
There is no easy fix, however, as tuning Elegoo Mars become my hobby in the last few months, I decided to rebuild the Z-axis. You can see the results below:
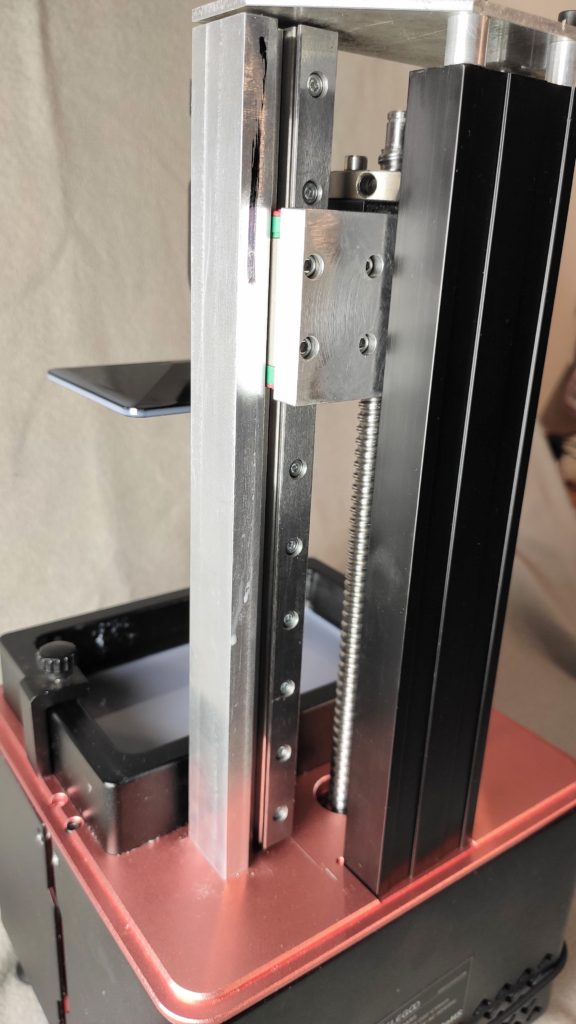
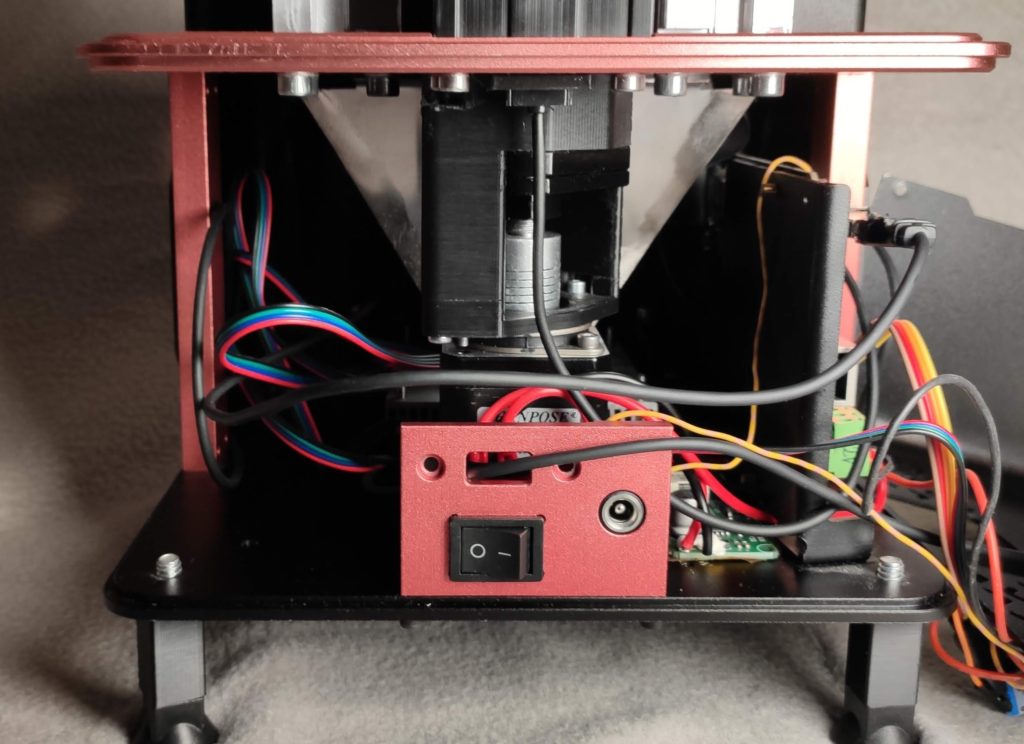
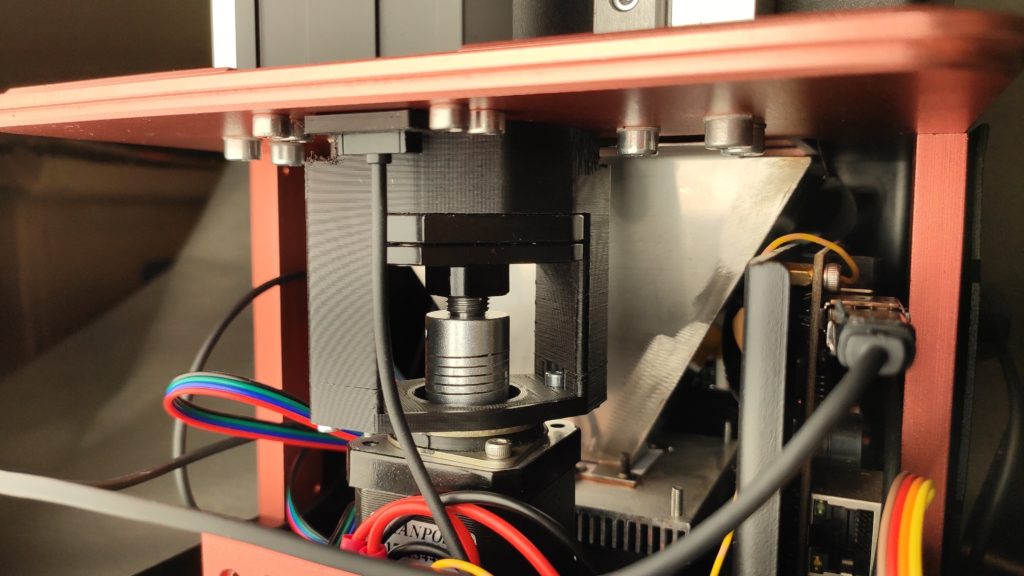

I machined the new axis column and mounted two linear rails there. The columns are scraped so they are perpendicular to the display – currently, the perpendicularity is withing 0.03 mm/150 mm. I am not sure if it is an improvement over the original rail as I forgot to measure it. Also, the new rails were shifted so the linear rails are in a plane of the screw – this arrangement should minimize the wobbling of the carriages caused by the screw pushing to them.
I also decided to switch to a ball screw instead of the original one. Precision was not the main reason here – the original screw is pretty good and also featured practically no backlash when I used a casted nut. However, the casted nut has a too tight fit and squeaked occasionally. It was also an opportunity to use a proper screw housing with proper bearing. It also allowed me to mount the motor using a flexible coupling, thus to mitigate resonances from the motor. I used 1204 screw with appropriate FK10 housing.
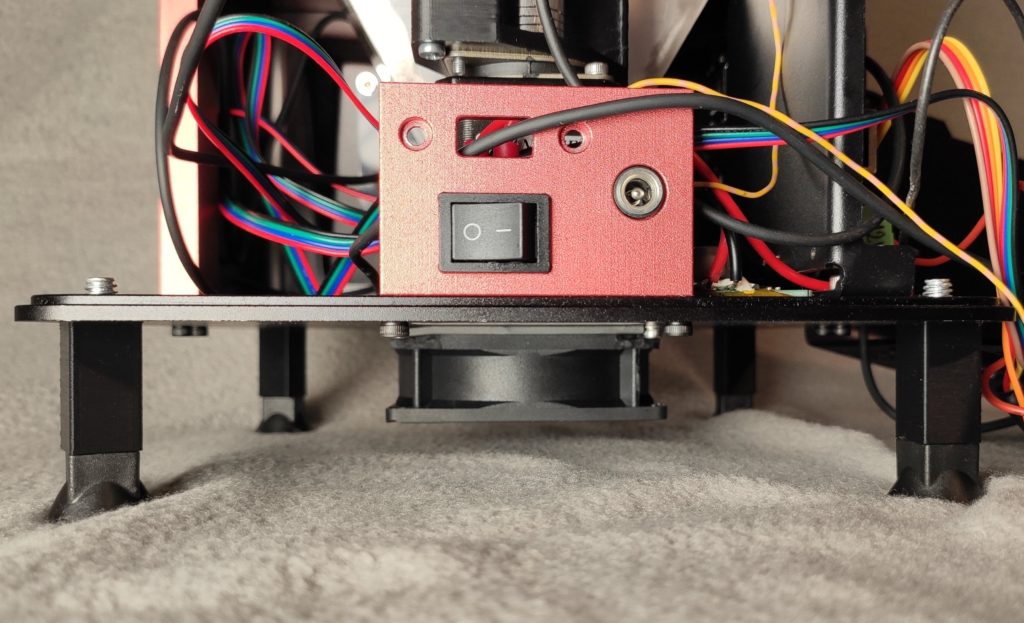
I also changed the stepper driver to Trinamic TMC2025 – it supports StealthChop – a special current chopping, which allows the motor to move practically silently. I also changed the fan for quiet one.
Note that the modification are not final yet – some prototyped 3D printed components need to be properly machined (this is mostly as a proof-of-concept) and the wiring needs to be tidied a little.
Results
The most noticeable improvement is the reduction of noise during printing. The printer is quieter than many laptops. I have also verified the printer produces square models that fit nicely together – and most importantly have the correct height. However, there is minimal or no improvement in the surface finish – it stays pretty much the same (as there is not much to improve anyway). So if you are printing minis and not functional pieces do no bother with such tuning.
If you are interested, you can download the CAD files for modification: https://a360.co/36D6BHS.
Did you enjoyed the post? Consider supporting me on Kofi:
Recent news: My open letter to the 3D-printing community
I love the 3D-printing community, but I think there is room for improvement. Let's get better in 2023! Read the full letter.
Support my work!
If you like my work (these blog posts, my software and CAD models) and you would like to see more posts on various topics coming, consider supporting me in various ways:
- You can become my sponsor on Github.
- If you prefer, you can also become my Patreon.
- You can buy me a coffee on Ko-fi,
- or you can buy something from my Tindie store (also see below),
- Or you can just share my work!
If you are interested in knowing what I am up to and recent sneak-peaks, consider following me on social media (Twitter, Instagram, Facebook).
My store offers
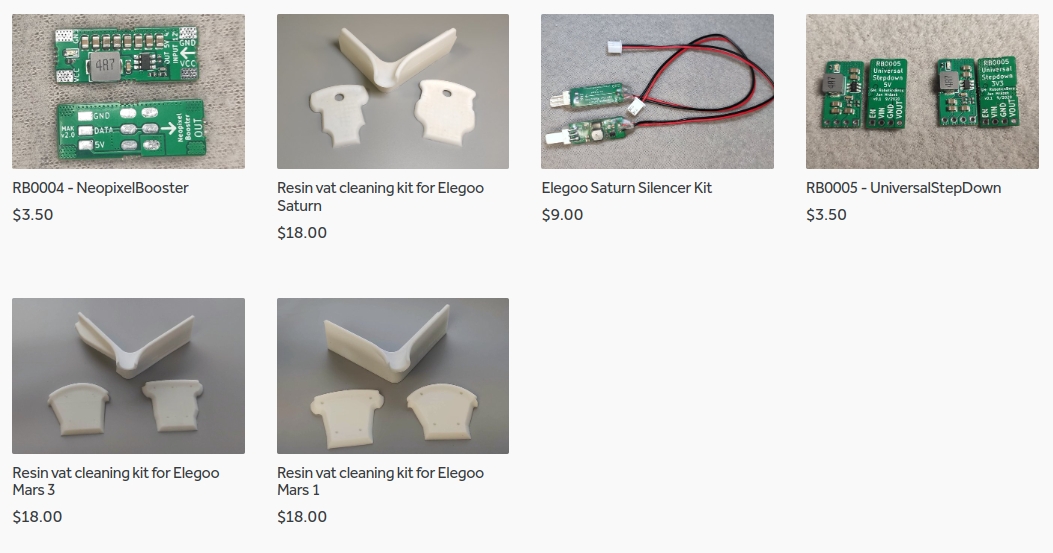
I launched new tank cleaning kits for Elegoo Saturn, Saturn S, Mars 1, and Mars 3. You can find them in my store.
Will you make the CAD files for the FK10 mount available?
Everything is in the CAD file linked in the end of the article – some components are just hidden (I didn’t realize that Fusion 360 stores visible/hidden information in the files).
Hi, I am also trying to print engineering parts, but the tool does not work for Elegoo mars pro 2. Is there a version for this?
I will buy you a few coffees!
Thanks
Use UVTools: https://github.com/sn4k3/UVtools It is a far superior tool to my utility, which is no longer maintained.
Hi Jan, your research here is very interesting and it has made me wonder if the same issues (and fixes) apply to the Elegoo Saturn Z-axis? I’ve noticed some flattened/squished prints myself. I noticed that you have an Elegoo Saturn yourself so I was wondering if you’ve done any more research on that.
I also noticed you’re the same person that I bought the 24v to 12v converters off of recently, I got them installed now and I’m really happy with the noise reduction, thanks! 😀
Hi, I did research on Saturn, unfortunately, I wasn’t able to finish the fix a do a proper write-up. The problem is not in screw mounting but in the construction of the Z-axis. The whole printer deflects badly in the first 5 mm of the print, which leads to the need for long peeling distances and unfortunately squashed bottoms of the print.
To give you a little teaser of the simulation of the problem:
– https://files.honzamrazek.cz/deformation1.png
– https://files.honzamrazek.cz/deformation2.png
The simulation confirms my measurements and unfortunately also confirms that the weak spot is not the Z-axis column itself, rather the base plate of the whole printer.
Thank you for supporting me via the Silencer kit. I hope you will enjoy it!
Unfortunately I cannot view the images as I need an account to log in first.
So if I understand correctly, printing on supports that are at least 5mm long should help with accuracy for now?
I hope you can manage to finish the write up for this sometime, I appreciate your research a lot!
I am sorry, I thought that Slack allows for unauthenticated access. I modified the comment.
Basically yes, if you print on support and you don’t have any large cross-sections (let’s say more than 30 % of the LCD surface) you should be fine.
Thank you, I understand now! This deflecting or flexing.. can’t it be fixed by adding some kind of support inside of the printer, under the part that deforms while printing?
It’s good to know that it’s not specifically my printer but a general Saturn issue, I’ll be printing with supports from now on. Thanks for your help!
Hi, thanks for everything !
Do you have more info on changing the motor driver with a tmc2025? I would love to quiet down my mars 2 pro like I did for my FDM using trinamic drivers 🙂
Did you use the pins
swc9–>en
swi7–>dir
st–>step?
to control the driver in standalone mode?
I don’t know about Mars 2, but there is an unpopulated pin header on Mars 1 I used.
Hi Jan,
I have noticed this on my elegoo mars and saturn as well. When you start a print and the build plate goes all the way to home, the Z axis rail bends so much it hits the enclosure and pushes it back a bit! The more viscous the resin the worse the problem. I’m always watching this and thinking, 1. Why did I spend so much effort setting a Z=0 offset location with a piece of paper when it obviously doesn’t matter, the build plate clearly never gets there before the first exposure starts. and 2. the forces on the LCD must be enormous! I can’t believe that thing doesn’t break!
But I have another question, I recently put longer (500mm) z rails on my elegoo saturn. I put a new LCD screen at the same time, so before I started running tests I upgraded to the latest Saturn firmware. Unfortunately for me, the old firmware had no software limit on Z axis travel, you could keep telling it to move the plate up and it would just keep going. Now that I have more room to move up, of course, the new firmware has a software limit and I can’t move the z axis above 200mm.
Do you know where I can download old versions of the firmware? Do you know if there is a way to disable or change the value of the Z axis software limit in the current firmware? Such a simple but frustrating thing!
thanks for your work here!
ahh…got it. Didn’t realize you could just print the machine parameters .gcode file to update values on the machine.
Lets see if I can print some really tall stuff!
I’ve noticed the same thing where the carriage is crashing into the FEP & ultimately LCD when setting Z=0 the way Elegoo recommends. I’m experimenting with using the FEP to set Z=0. When I print the staircase print where each step is one layer (.05mm steps, 20 in total for a predicted 1mm height), the first step is .15mm and then each step from that point on is very small. My overall staircase ends up ~.5mm (50% of what it should be). I believe the tray is just crashing into the FEP for many of the first layers and only the small layer of resin that gets trapped is cured (instead of leaving a .05mm gap and curing that as it should). I notice this issue most with thin resins which can mostly escape when the tray comes in contact with the FEP. I end up with weak adhesion to the tray because the 5 or so bottom layers end up with minimal thickness. Eventually the Z-axis stops deflecting and then each layer is the correct distance.
I don’t understand the elegoo instructions for leveling at all, or the purpose of the software z=0 offset.
I do the same as you I think and use a FEP sheet when leveling the build plate. I just use a tray that doesn’t have any resin in it, FEP only. Loosen screws on build plate, hit the home button, hold plate while tightening screws, then set z=0. I don’t see why the Z=0 position should be anywhere besides right there. Printing doesn’t start from 0, it starts from 1 layer thickness above 0. Also, each print starts with a homing procedure, which takes the plate all the way to the end stop regardless of where the software z=0 position is.
For the build plate to ACTUALLY make it all the way to the home position during the homing procedure at the beginning of a print, all the resin would have to be squeezed out. Then, if it just moves from there up to your software z=0 position+1 layer thickness to start the print, I don’t think resin would have time to flow back under the plate. That gap would be so small you would need a lot of pressure to force it back under.
I think if you wanted to add an offset for Z=0 you should add some thickness to the FEP when doing the leveling procedure (maybe a second sheet of FEP or something even thinner), and just always leave z=0 at the location of the end stop so you never end up (trying) to move the plate lower than z=0.
After I do that leveling procedure with the empty tray, if i raise the build plate and then hit the home button again, it drops right to the FEP and kisses it just perfectly like you would expect. Once you add resin and repeat that homing procedure though, the deflection is huge. You can slow down the homing speed and get a better movement, but you probably never get all the way to the real z=0 cause you cant’t force out all the resin.
I don’t know what would cause bottom layers to be too thin, seems like the build plate could never actually get close enough to the FEP to give an accurate 0.05mm layer, so bottom layers would always be thicker than desired.
I’m thinking exactly like you are about this. Though when I try to position Z=0 to where I think it should be, my prints stick to the FEP. I wonder what effect the spring loaded build tray has as when it is homed and the screws are tightened, the Z-axis might have some bending defection (angling your bed while the screws are tightened. I haven’t been able to detect any additional thickness along the short build tray axis so this might be negligible. I also haven’t been able to fix the Z-axis compression of ~.5mm at the start of my prints by homing in different ways and leaving different gaps.
It is my belief that the Elegoo method of homing works simply because prints where the tray is smashing into the FEP for the bottom layers adhere well. This is why my first layer is triple thickness (the amount of resin that cannot escape between the tray and FEP, and the subsequent layers are 10% of the ideal thickness until several layers have passed (Z-axis is no longer straining) and then it begins to create layers the proper thickness for the rest of the build.
I don’t have a spring loaded build tray. Spring leveling systems in general drive me crazy. I do add the wham bam removable build plate to my elegoo printers though. I did have issues with prints not sticking to the removable build plates (smooth spring steel). But I scuffed them up with 50 grit sandpaper and never had issues again.
You could try homing your build plate before you start a print. Leave it there for a few minutes, so resin has time to get smooshed out, then start a print. It will home again but only raise up a slight amount for the slow home move. Would def allow less resin under there for the first layer. The time off delay in chitubox doesnt get applied to the first layer unfortunately, so you’d have to do it manually like this. Then for your bottom cure layers, leave an excessively long light off delay time to see if it allows the build plate to settle into position better.
When you say “After investigating the Z-height inaccuracy on the Elegoo Mars, and applying the official motor replacement sent to me by Elegoo”, do you mean that Elegoo supplies an improved motor on request that eliminates the backlash issue?
Or do you just mean that you broke your original one and they sent you a replacement?