I use my beloved 3D printers Elegoo Saturn and Mars to produce various functional components. However, resin is usually not the ideal material for me as I need stronger, less brittle or flexible components. Therefore, most of the time I print molds and cast my components either out of polyurethane or silicone.
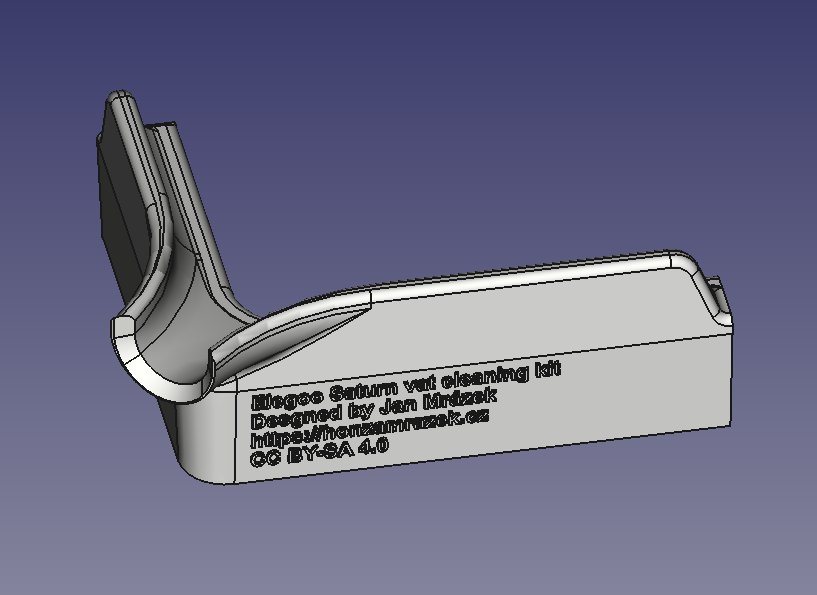
Let me show you the easier of the two – silicone molding – in this post. I will demonstrate it on piece I designed last week – the cleaning kit for Elegoo Saturn’s resin vat.
The component
Swapping resins is not a pleasant experience. Evertyhing that touches resin becomes sticky and potentially iritating for your skin. On Mars, I bought multiple 6 vats and avoided swapping resins if possible. However, Saturn vats are not available for purchase yet.
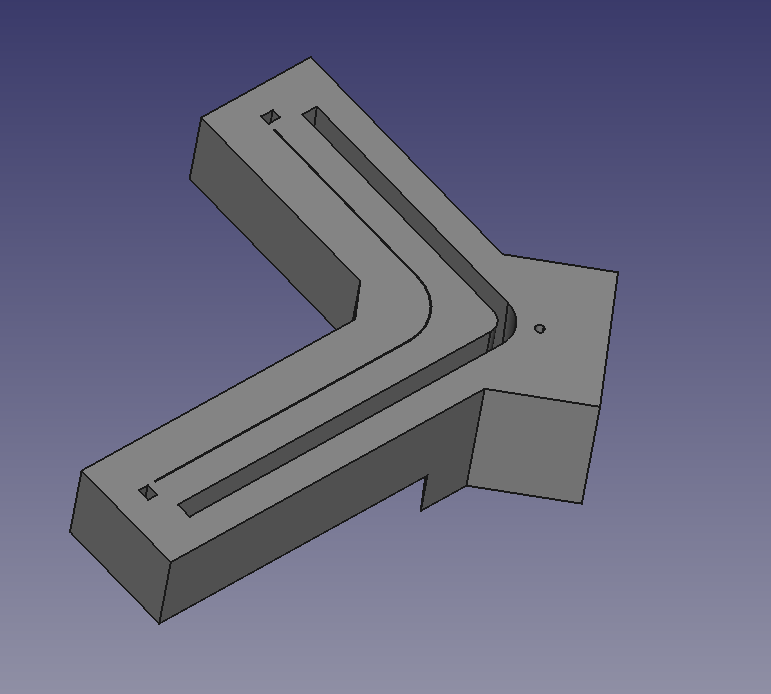
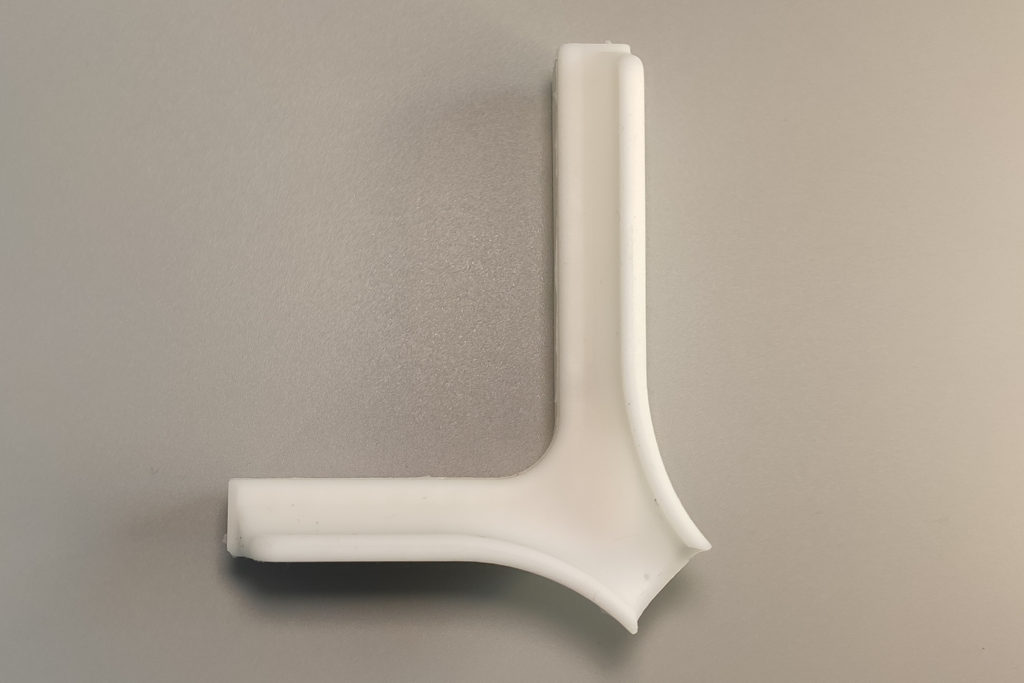
The design of the vats is not ideal for pouring – it does not feature a single sharp pouring edge which does not drop. Instead, if you pour the resin, it will flow on the outside walls of the vat, making it messy. So there is the obvious solution – let’s attach a spout that will direct the resin and also, it will feature a sharp pouring corner that does not allow the resin to flow on the walls.
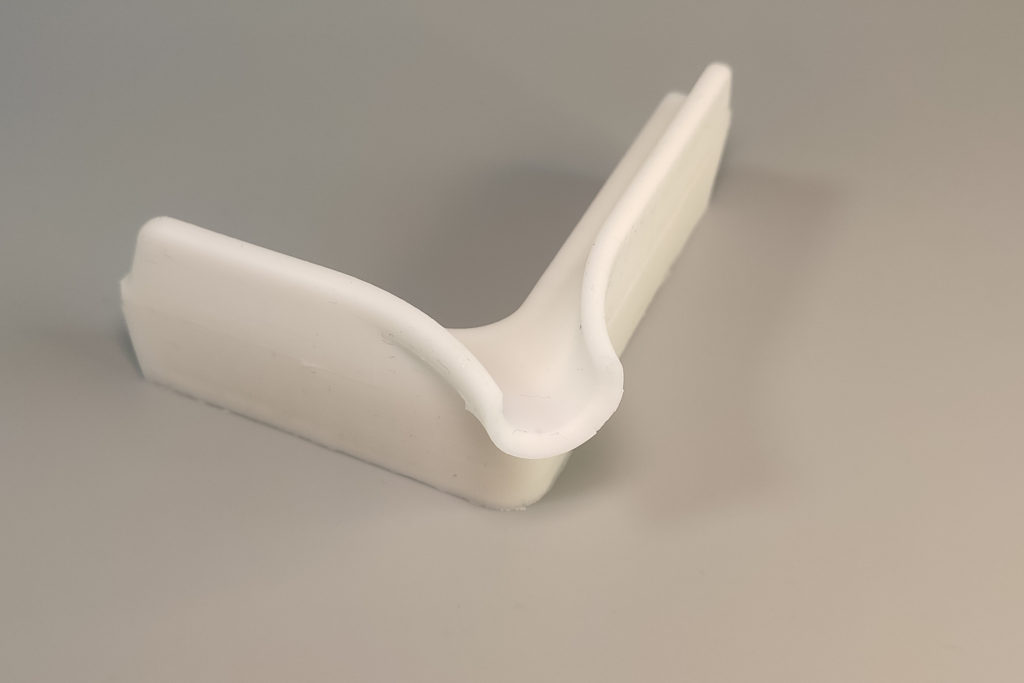
So I sat and designed such a thing:
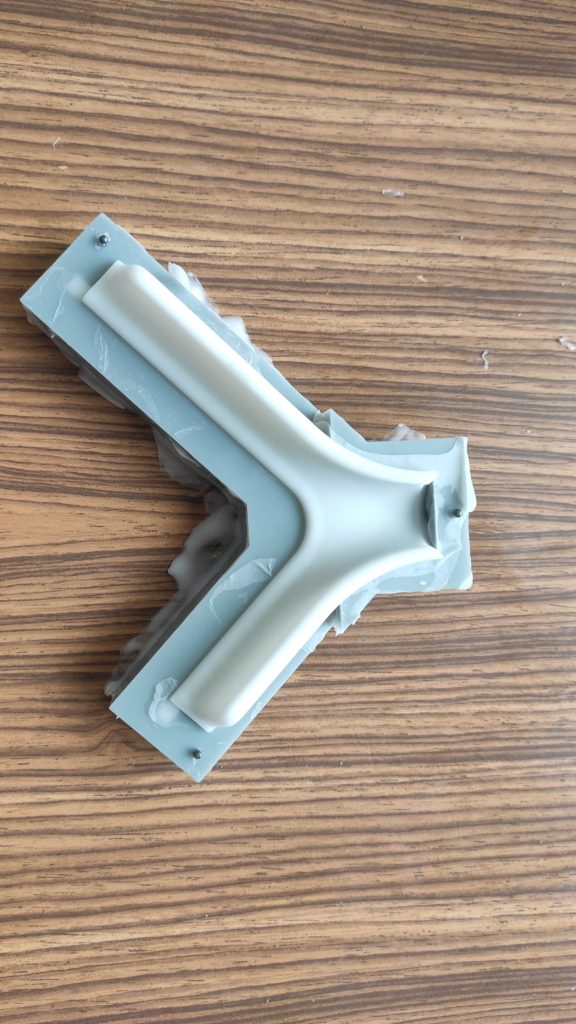
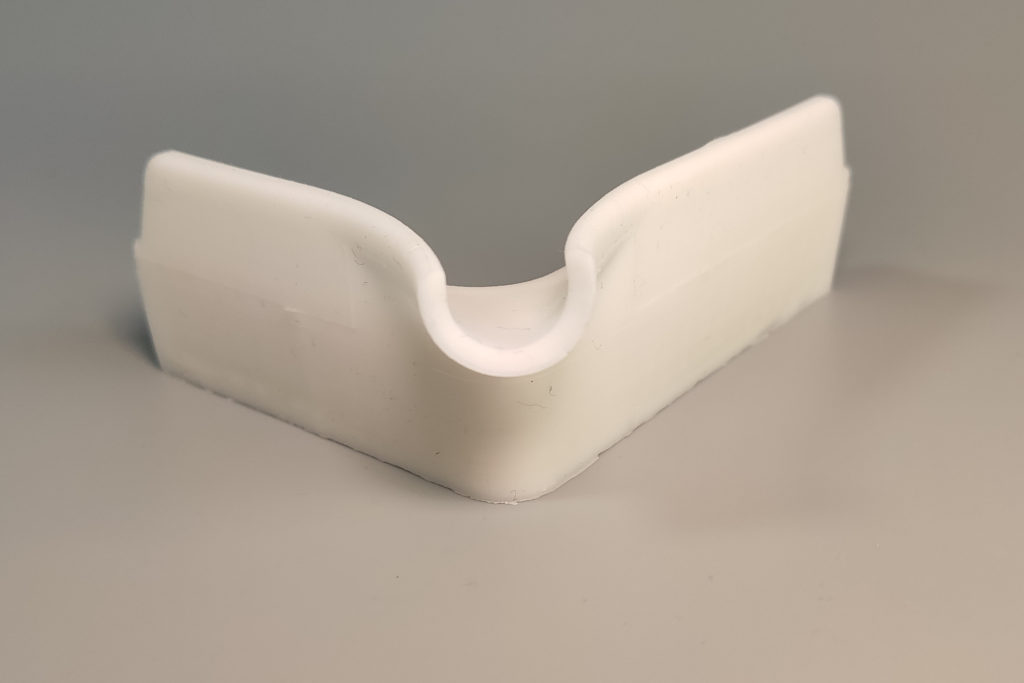
Spout front view
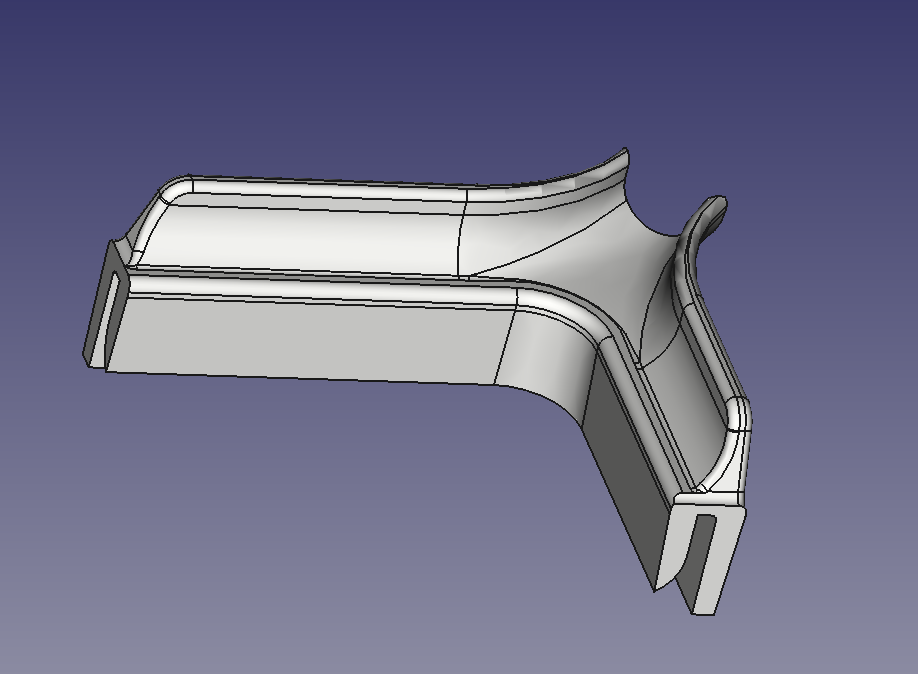
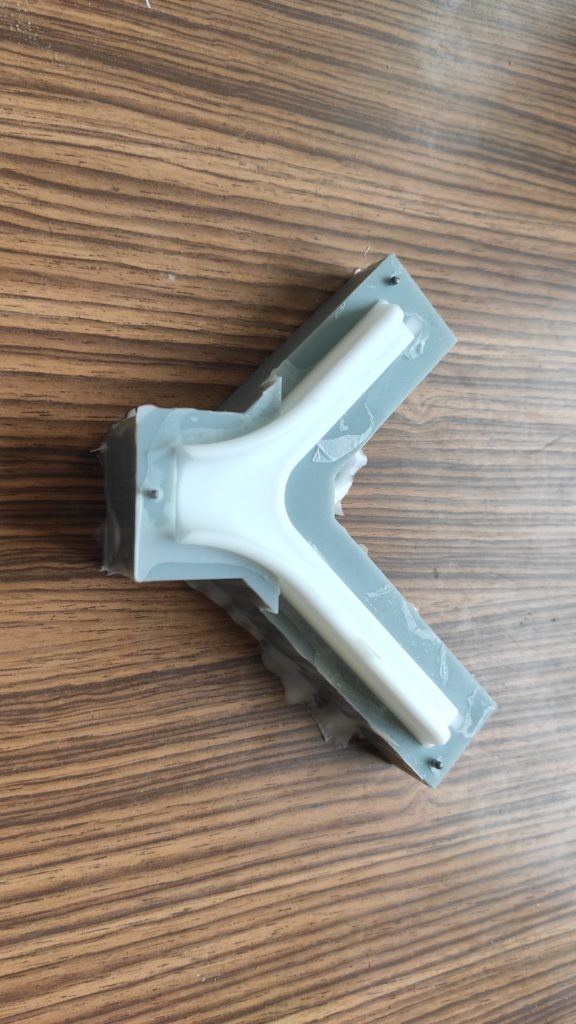
Spout back view
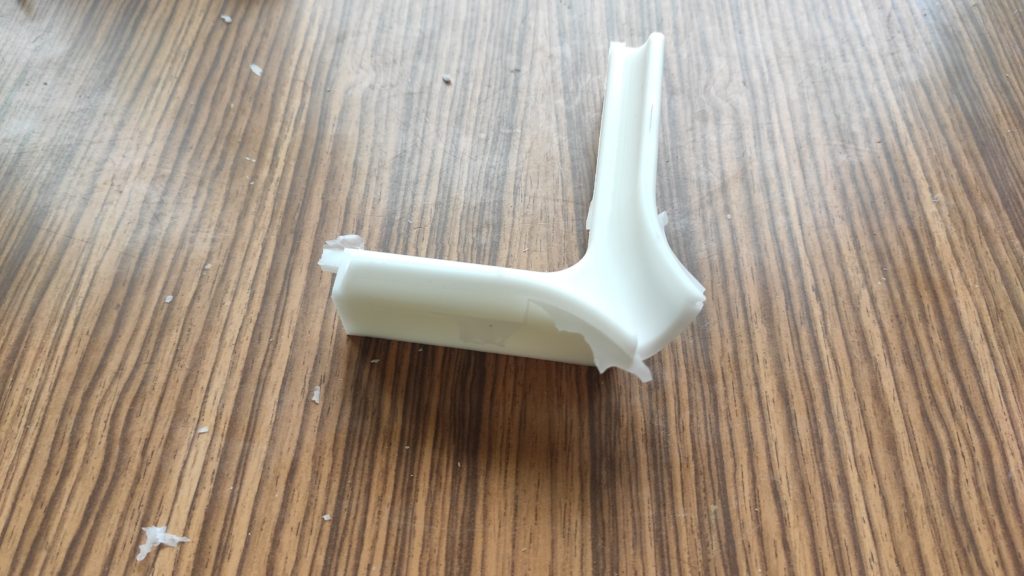
The first test pieces were printed. It worked, but it had two major flaws
- it did not stick very well to the walls or was extremely hard to put off as the resin is quite hard and not flexible enough.
- it got messy quickly. Cured resin to liquid resin contact does not yield nice drops, but instead, it spreads into a large area. Therefore, once you pour resin on it and leave it there for while it gets sticky all over the surface – yuck.
So there was the obvious solution – make it out of silicone. Resin on silicone forms drops, thus it is easy to clean. Also, it does not react with the resin and even when the resin cures, you can peel it of. As it is rubbery, it has large friction therefore it sits on the corner of the vat nicely.
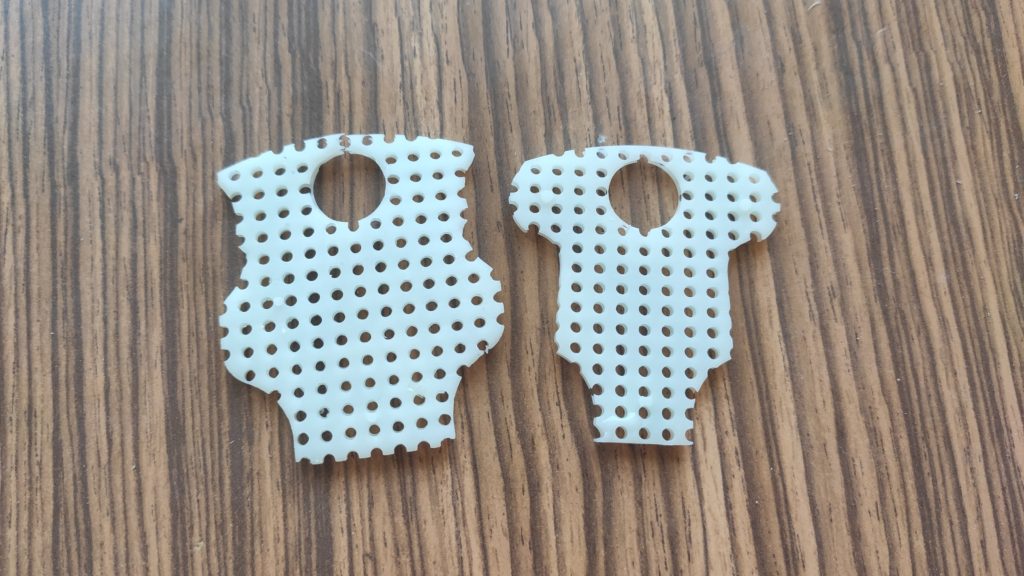
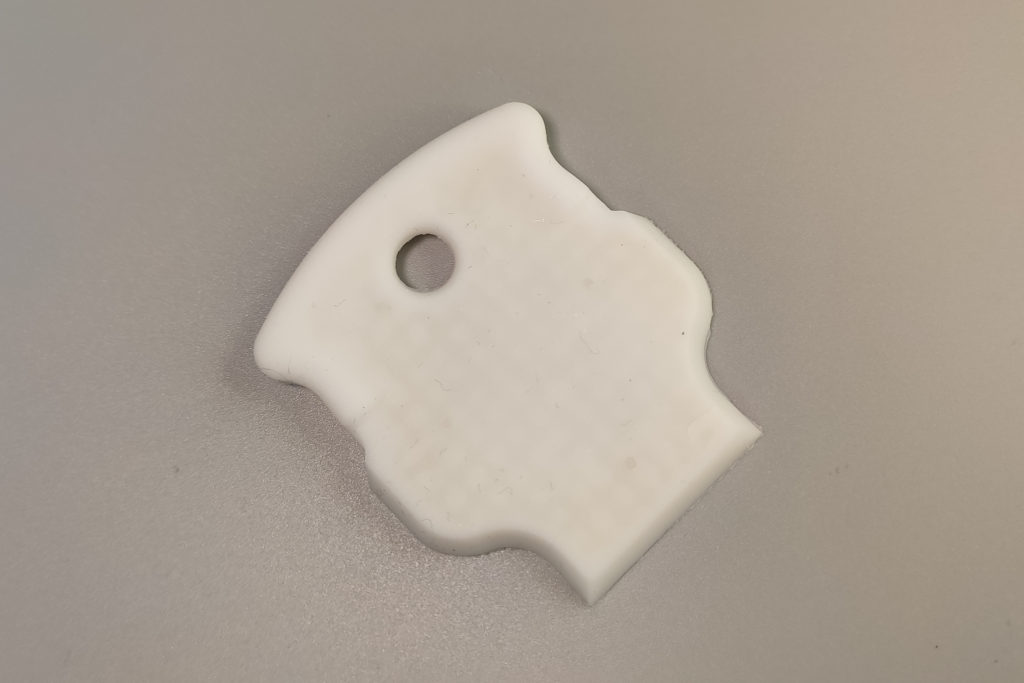
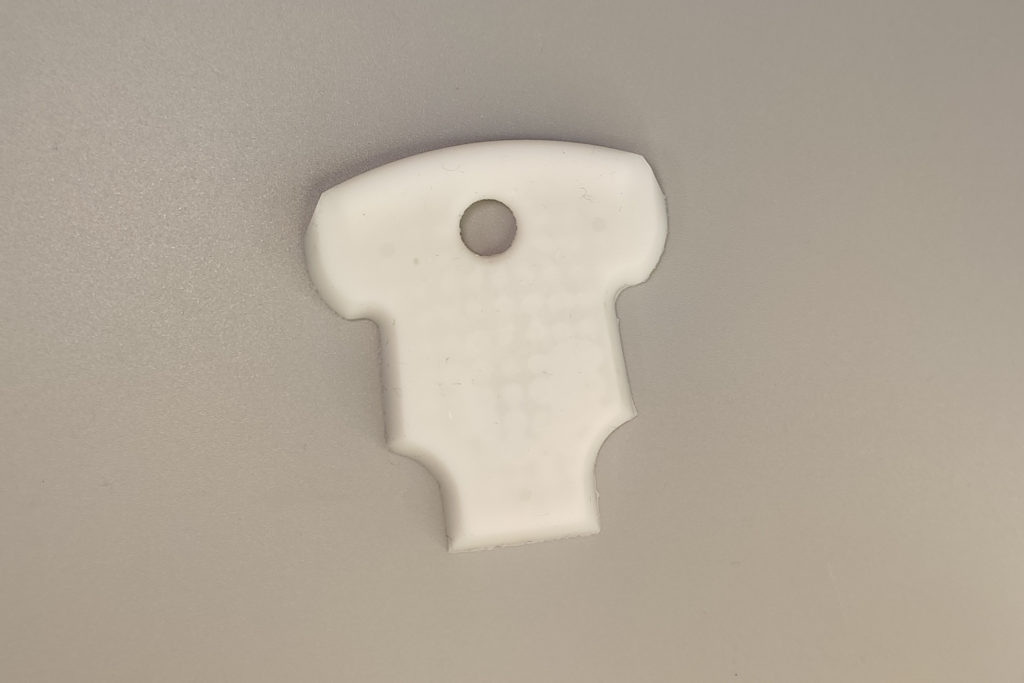
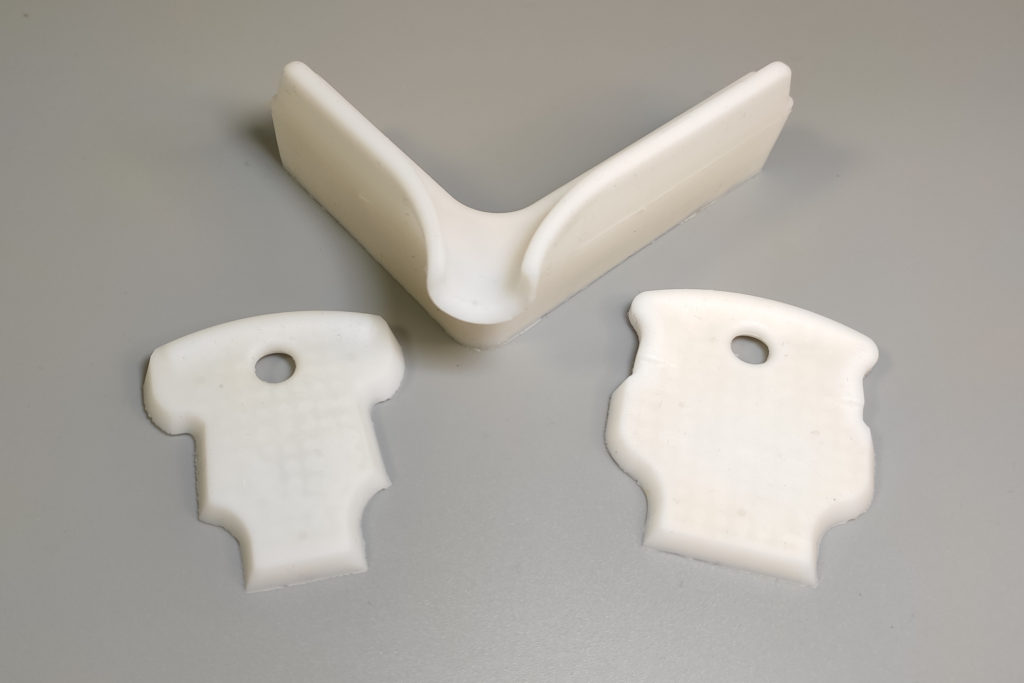
When I was testing the first pieces, I though – why not to also design a spatula that closely follows the complicated profile of the vat, so I can easily scrape all the resin? So I also designed two spatulas – one with the profile of the resin vat, one with profile of the resin vat with the spout on.
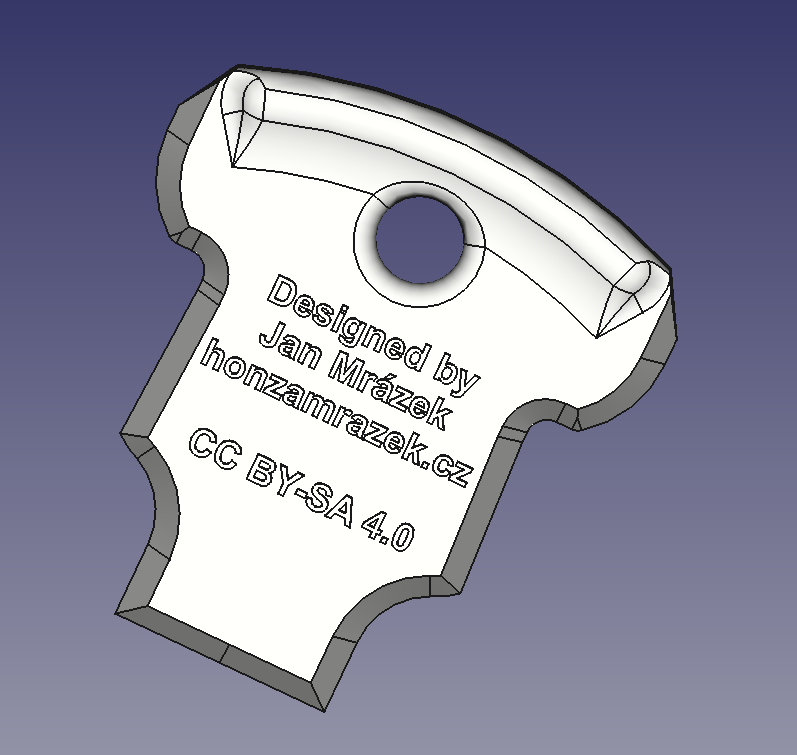
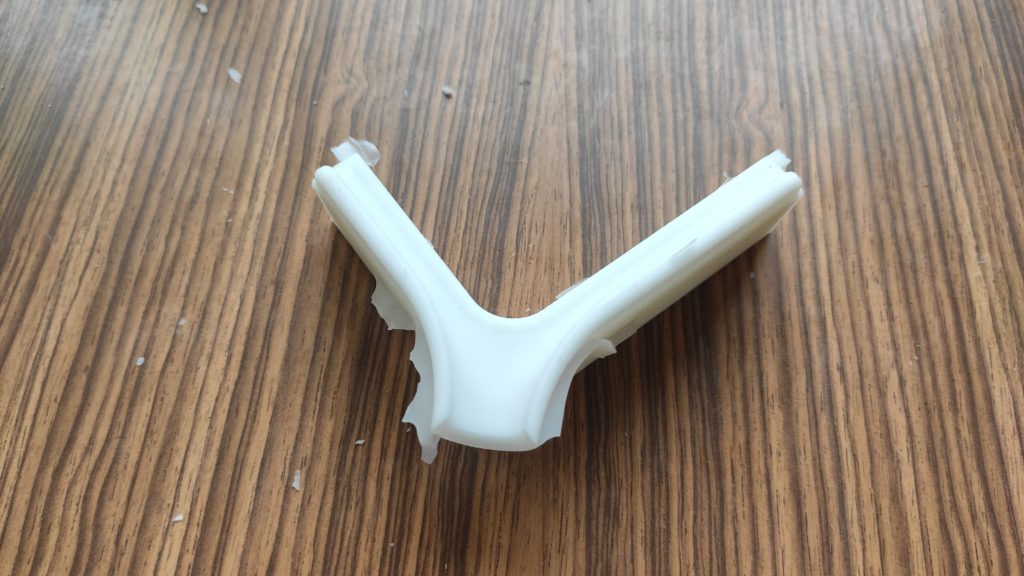
The spout spatula
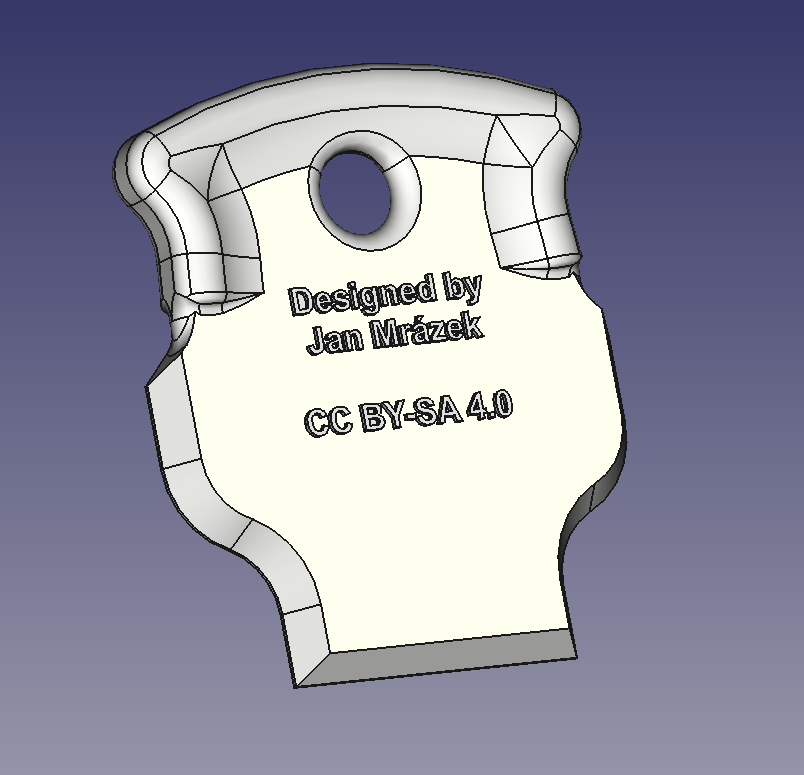
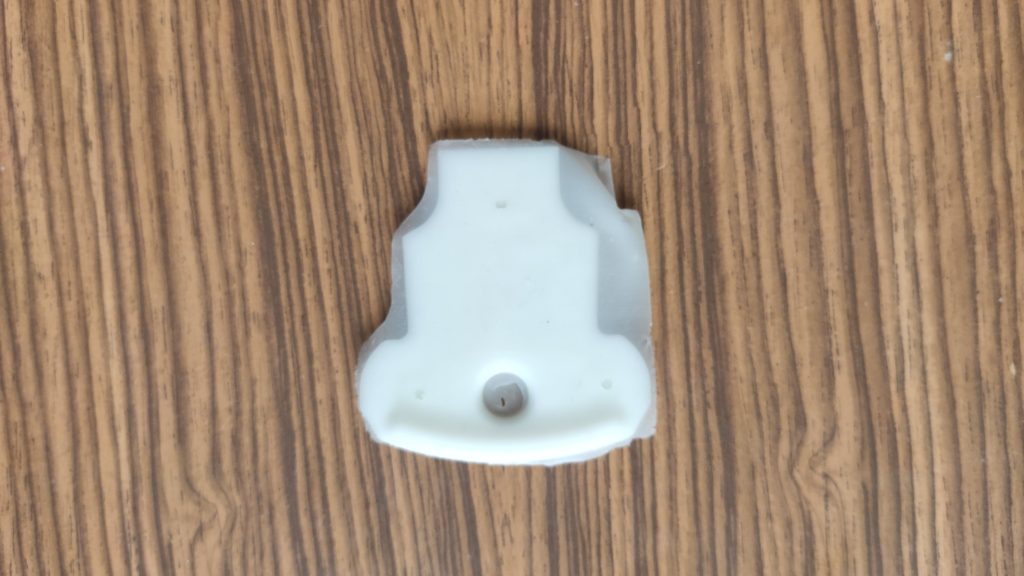
The vat spatula
If you are interested in seeing it in action, see the following video I made about it:
One note about the video; I received a lot of feedback that I show you can pour the resin into a bottle without filtering it. If there are pieces of cured resin, you will put them in the bottle, and then it can damage your screen of FEP. That is right – it can happen. However, I didn’t perceive it in my printing setup as a problem, so I didn’t think of it when making the video. So just to be sure; of course you can always pour your resin via a mesh filter. No one prevents you from doing that! Use common sense (as always).
The process
So once you have your basic model, it is time to make molds out of it. The design process is quite simple, as you directly print the mold and there are no intermediate steps. Also, silicone is very forgiving when it comes to the mold design – you do not have to care a lot about draft angles. If you include them, it makes your life easier, but they are not strictly necessary. Even small overhangs in the mold are fine and usually, you can get your piece out of the mold.
I am sorry about the quality of the photos, the process is messy, so I didn’t want to make my camera dirty. So there is only a couple of them, sometimes in werid angles.
What is however quite challenging for complicated molds for silicone is the air venting. Silicone is quite viscous when poured, so it can easily trap the air bubble inside. Therefore, it is recommended to include holes in the mold in the critical areas to ensure, that air can escape and not form any bubbles. However, every such vent hole means there will an extra deburring step on the final component.
The viscosity also means that the larger the pouring holes are, the better. With a small pouring hole, you will have a hard time pushing all the silicone to the mold before it cures.
However, the viscosity also means that you can form small hills of the silicon during pouring, so you can easily have a non-planar separation line on your mold and it will be fine.
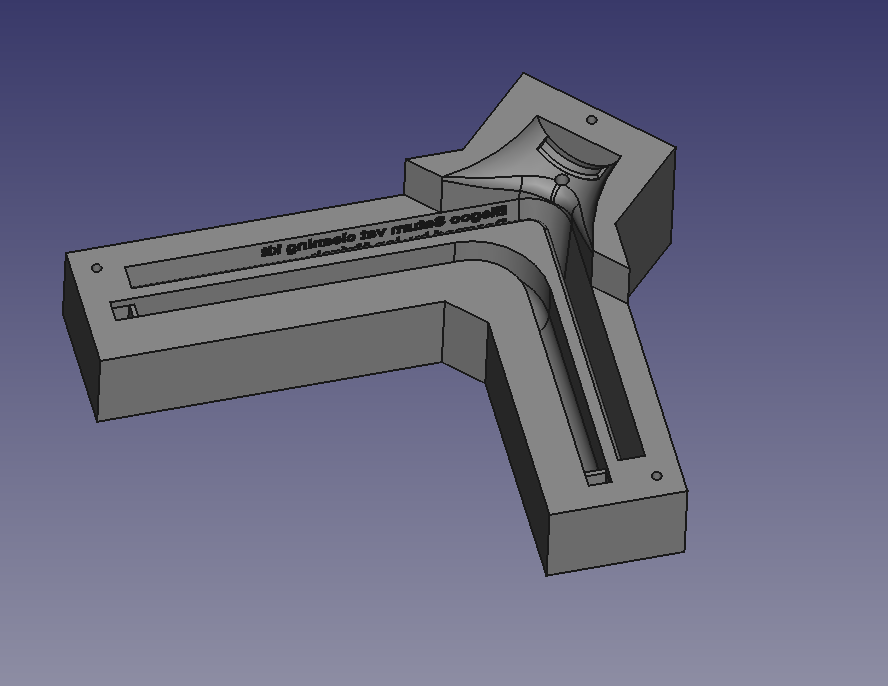
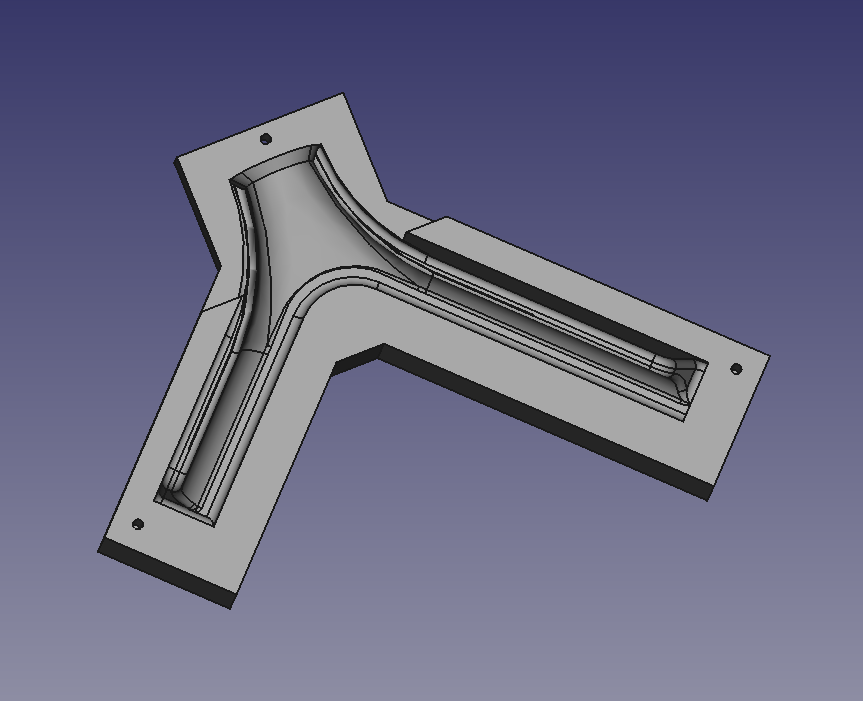
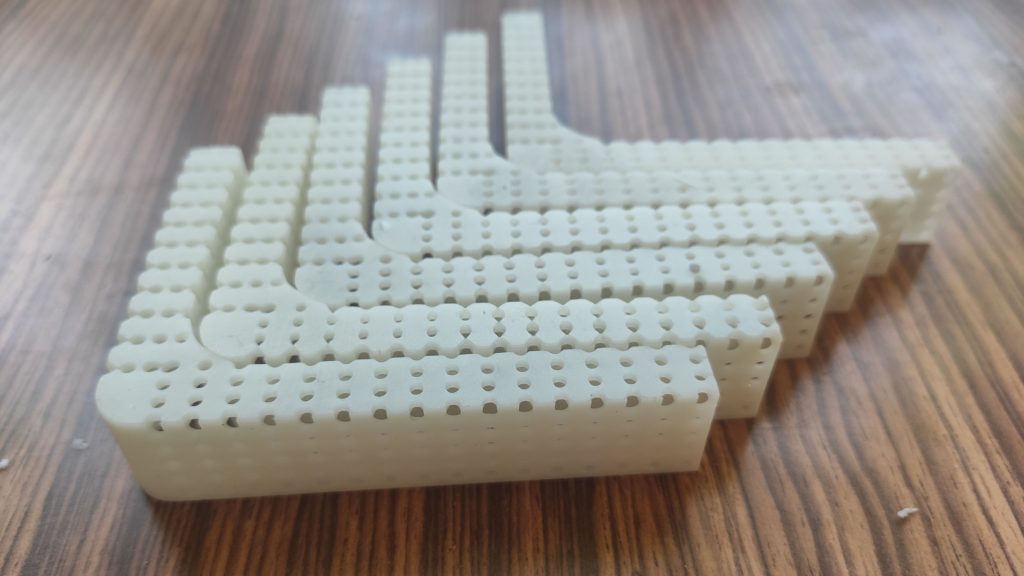
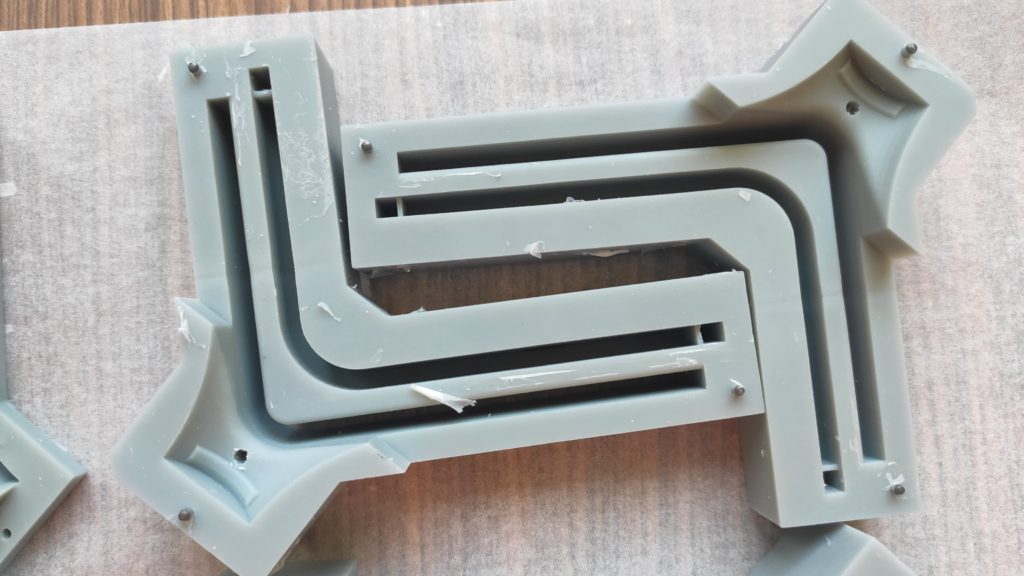
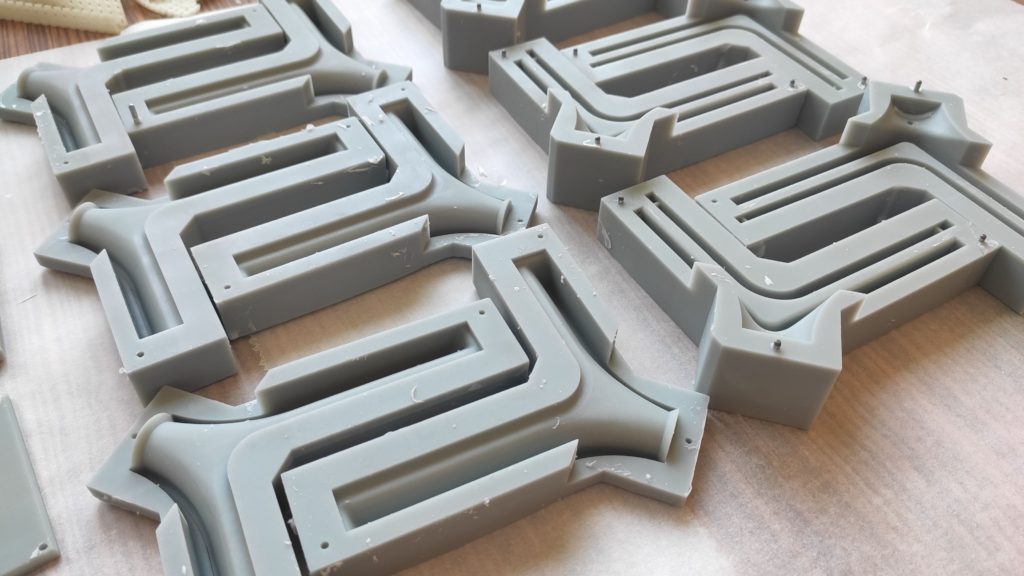
With the previous in mind, I created a two pice mold for the spout which is filled in open state and closed after filling. The pices are printed in Siraya Tech Fast. The molds for the spatulas are trivial. The molds are aligned by hardened 2mm steel pins.
It printed the mold. I also compensate for the combined 3.5% volumetric shrinkage of the resin and silicone. It is probably not needed in this case, but as I already measured the number, I use it all the time.
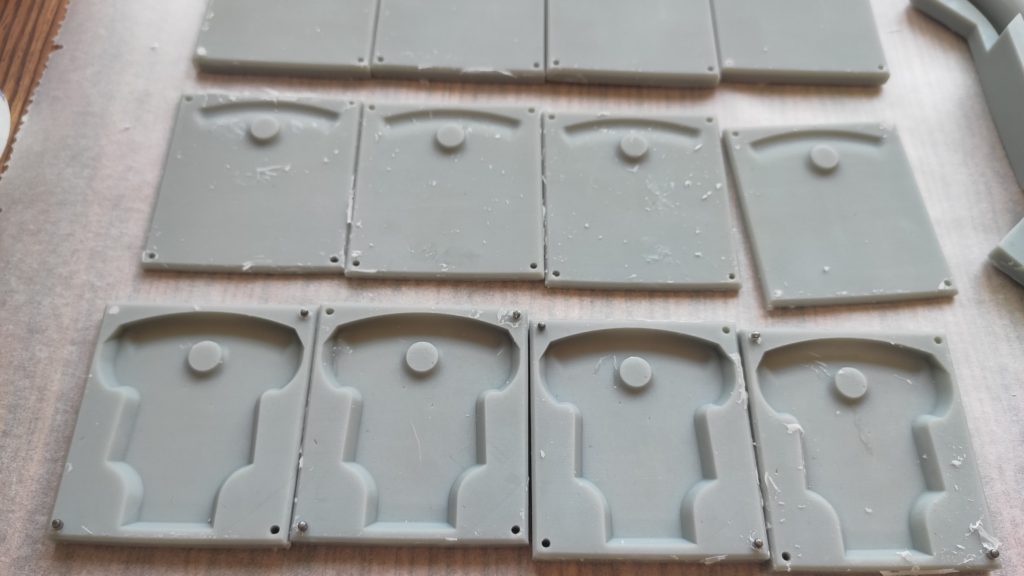
I did not print it directly flat on the build plate – there are a lot of cavities and the suction effect (that collapses your prints) is quite strong here. So I printed it on 2mm supports which create a room for air to go in and out. However, I did not tilt the model in order to get nice and plat faces where the two parts of the mold sit on each other. The models for the spatulas were printed tilted 30° as they already form a suction cup and without changing the geometry, I cannot remove it the other way.
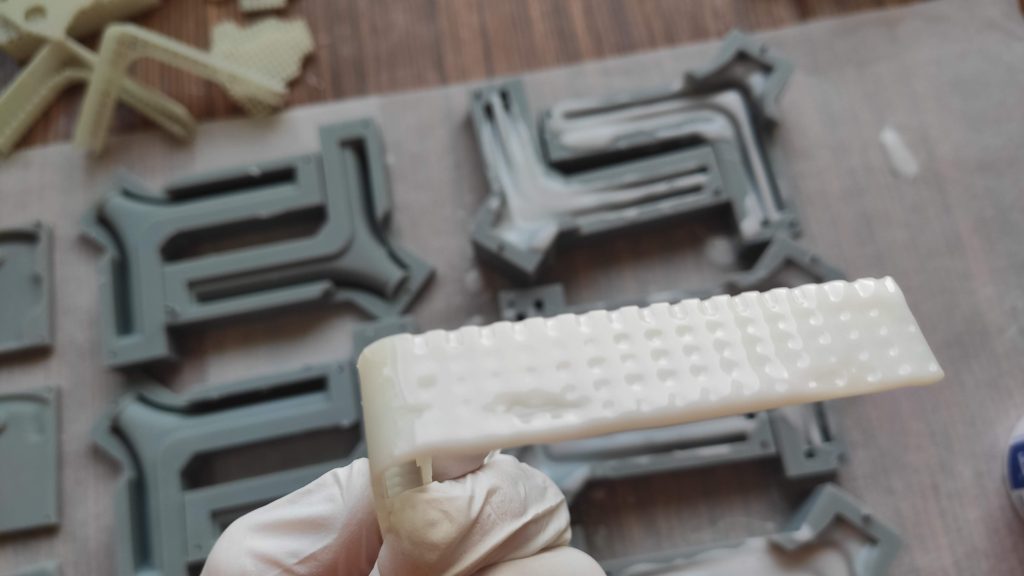
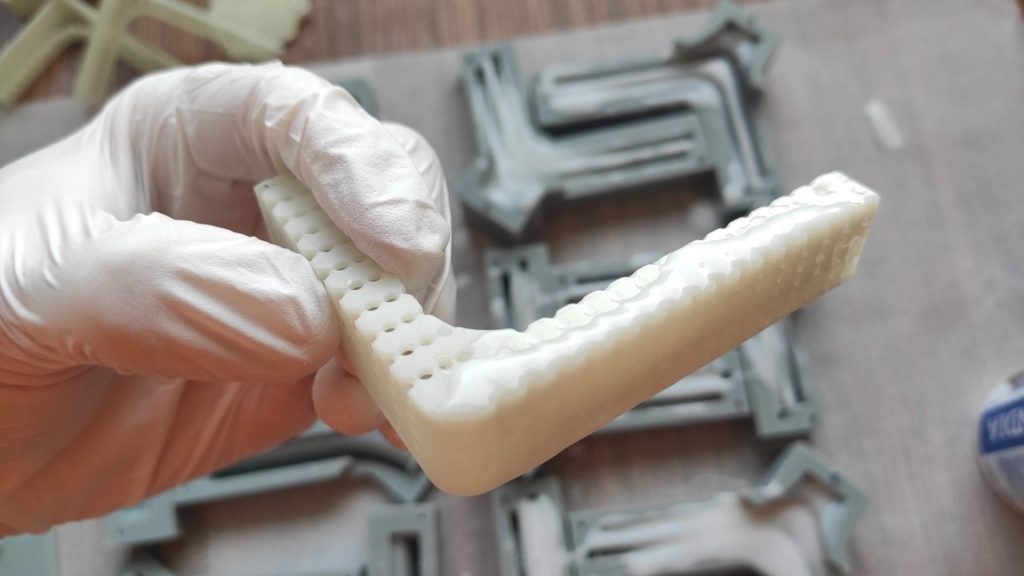
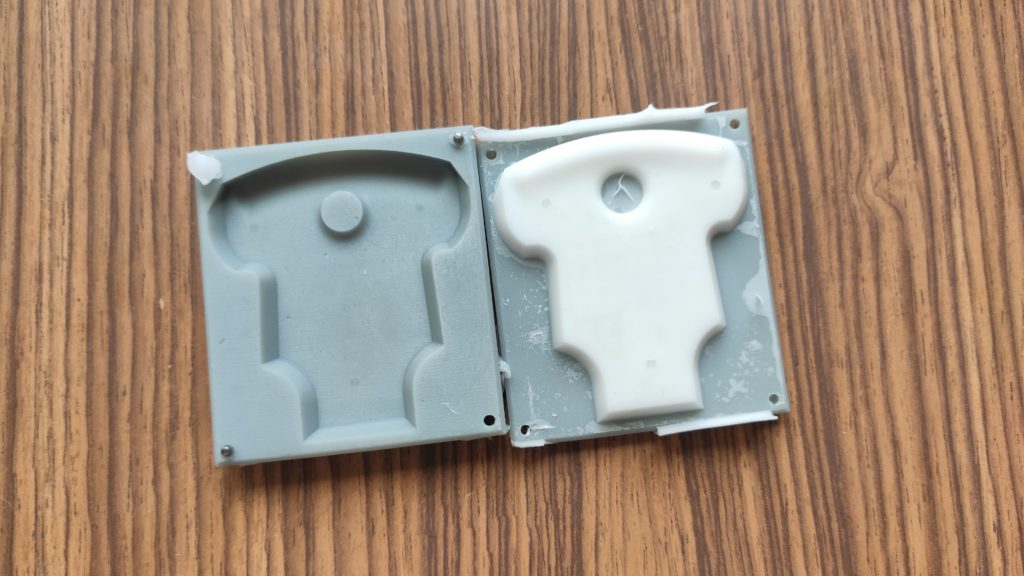
I also decided to include a stiff core in the models to make them more rigid (I do not need the elasticity, I need the soft surface). The cores are printed. Basically, they are just a smaller model full of holes. The holes are there to be filled by the silicone when casting, thus fully locking the core inside the final component. Without them, the core can easily pierce through the silicone. The cores have small notches that position them precisely in the mold. These notches are visible on the surface of the component, however, they are small so they are barely visible. But it is generally a good idea to place them somewhere where they are not visible.

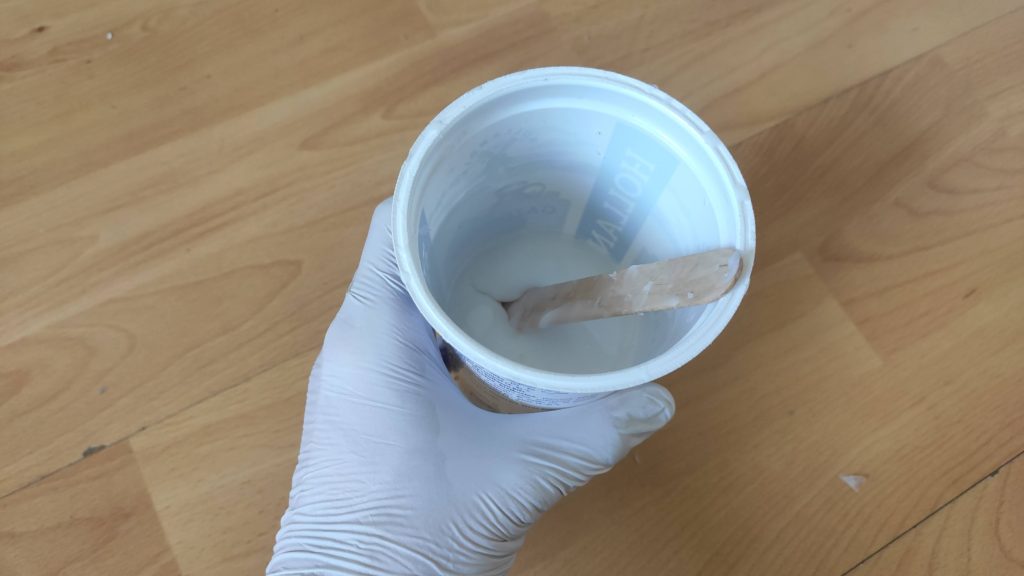
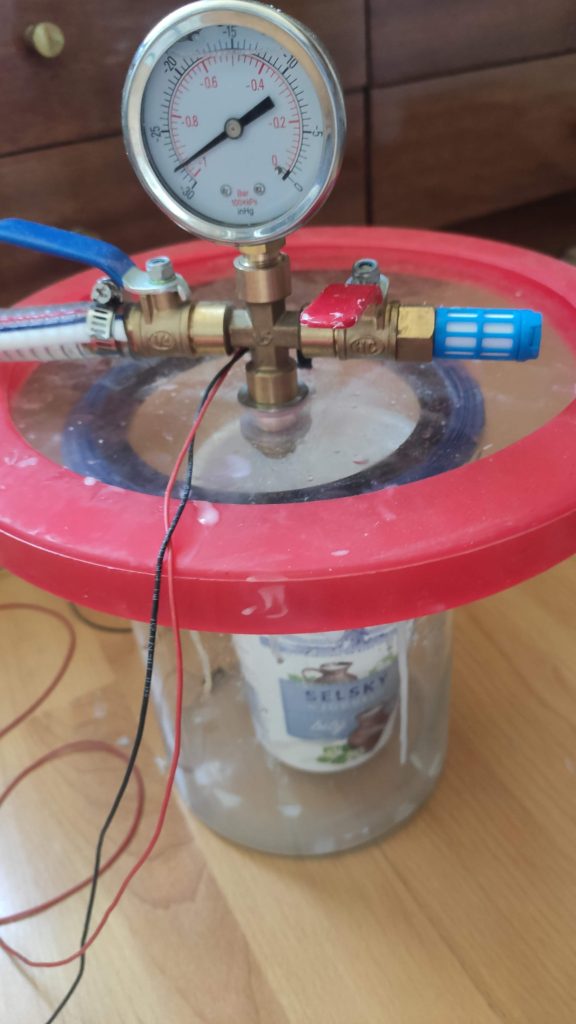
So it is time for pouring. I cover my table with baking paper, so the silicone overflows do not make the table dirty. Then I lay out the molds on the table and start mixing the silicone. I use my favorite Lukopren N5221 – a Czech brand of silicone. It does not interfere with the resin (as you can read on the FB groups) and works nicely. It is not the cheapest one, but it is easy to work with. For mixing the silicone, I just follow the manufacturer’s instructions. I use the mid-bound for the amount of catalyst to make the workable time of the silicone longer. Do not forget to mix your silicone well, otherwise, you might be left with a partially cured final part.

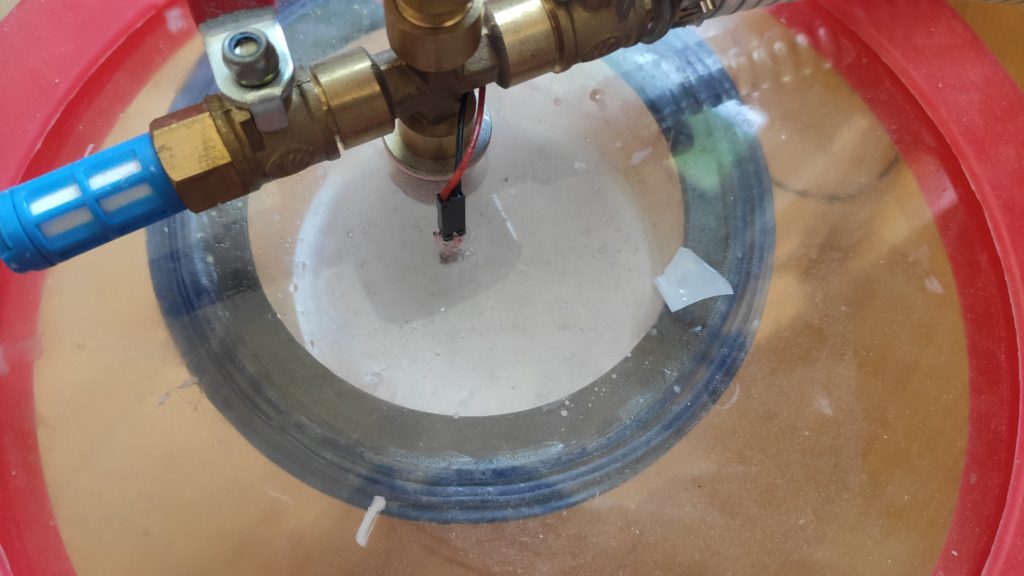
After mixing, I briefly degas the silicone in a vacuum chamber. It takes about 20 seconds to get all the bubbles out. Be sure to have a large enough container – the silicone raises to 2-3x times of its original volume during degassing. Do not degas it longer, as the volatile components in the catalyst will start to evaporate and the silicone won’t harden.
Then I start to fill both halves of the molds. There is no hurry – you have around 20-40 minutes before the silicone starts to form a gel (for comparison, some polyurethane resins form a gel after 5 minutes). Once both parts of the mold are partially full, I take a spatula and put some silicone into the holes on my stiff cores. Then I just press them into the mold, squeezing out the excessive silicone.
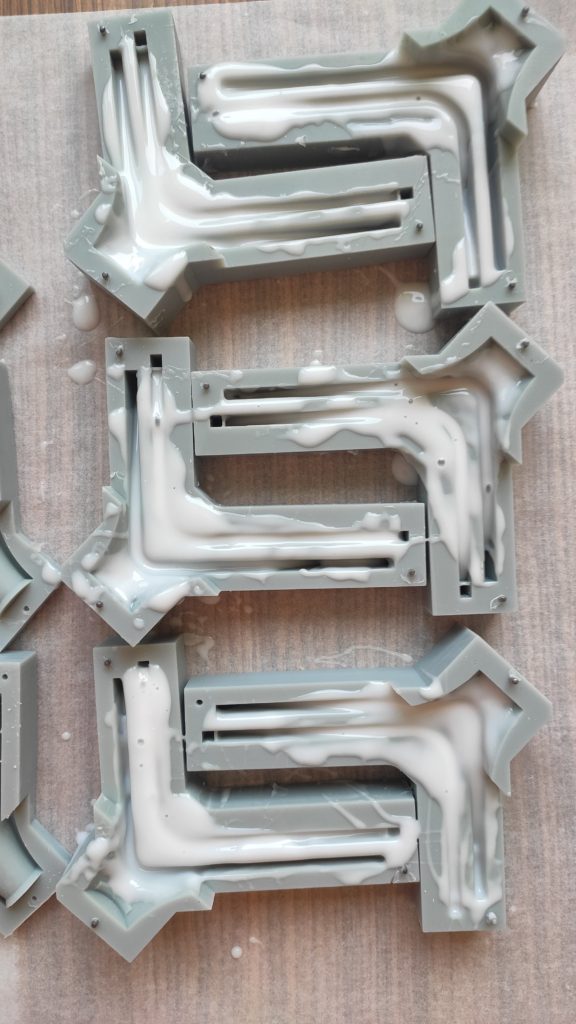

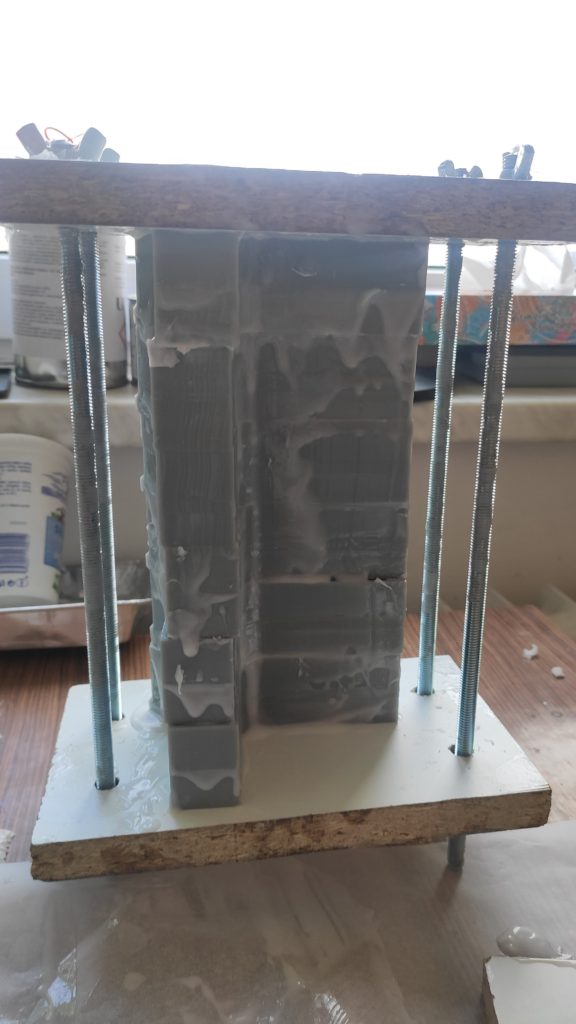
Then I just close the molds and press them via two pieces of MDF and several screw rods with a wing nuts as I don’t have large enough vice.
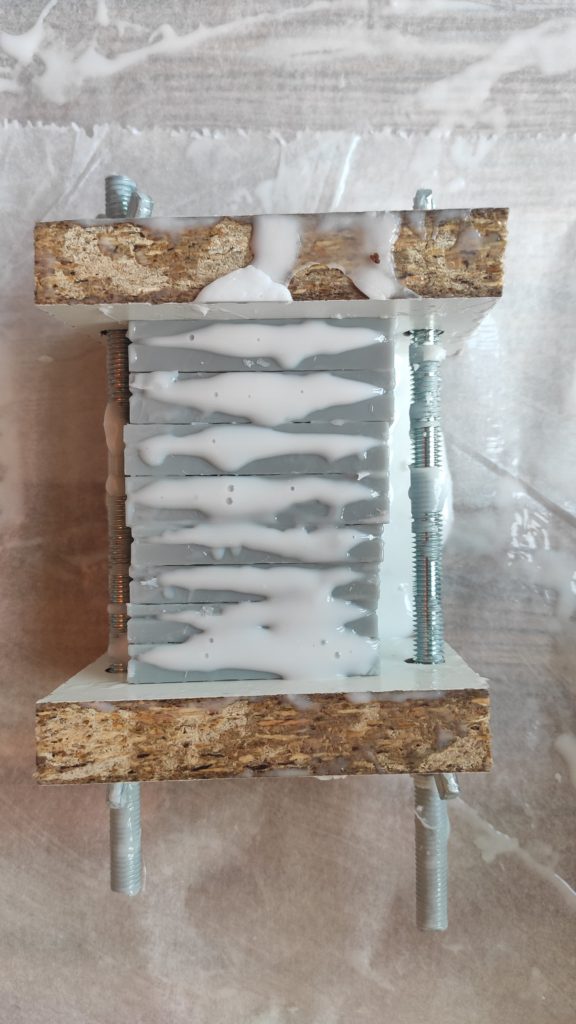
Note that some people degas the silicone once it is the molds. I don’t as it in many cases, make it worse – the bubble starts to raise up and gets stuck in the middle. It is better to design proper vent holes in the mold.
Lukopren N5221 takes somewhere between 3 to 4 hours to cure it enough, to remove it from mold. To reach the final properties, it takes about 10 hours. The demolding process is always very satisfying – I don’t know why…


One tip I learned recently. Lukopren requires air moisture to cure and actually, the manufacturer advises you to mix 4 drops of water per kilogram to the silicone to cure it faster. So if you want to demold your components quickly (in about an hour and a half), you can soak resin-printed molds in water for a few hours. Siraya tech fast soaks water (mentioned by one of their engineers on their FB page), so once you pour the silicone in, it starts to cure faster due to the presence of moisture in the walls. In this way, you do not shorten the workable time of the silicone.
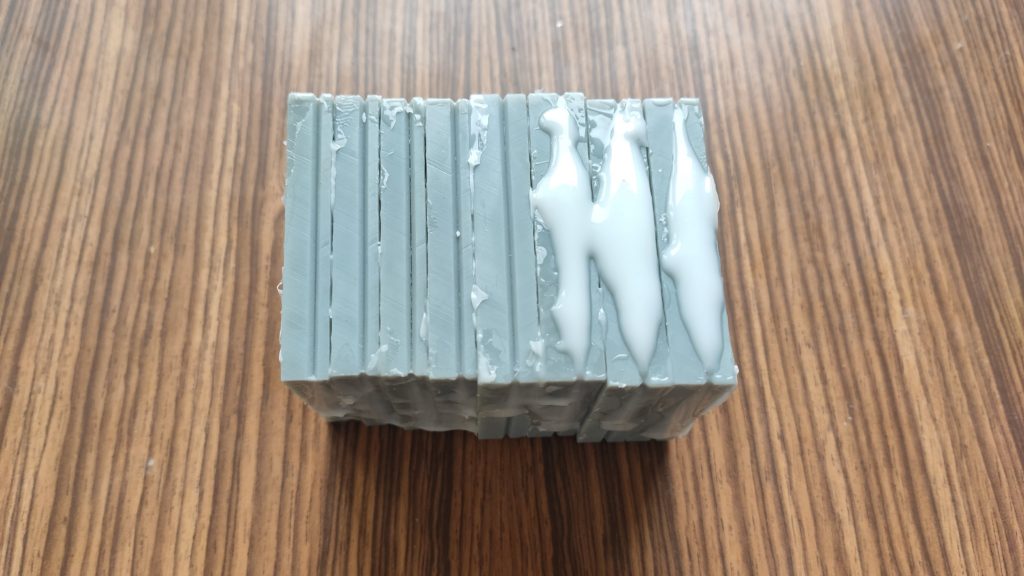
Results
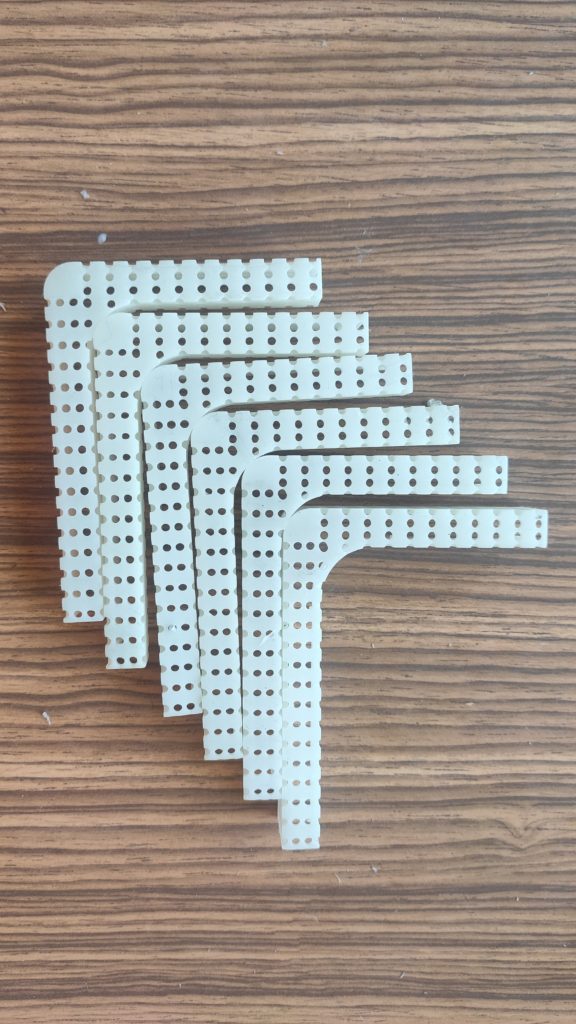
The tools turn out nicely – see the photos below. They are neat and easy to clean. The resin printing is awesome for the molds – there is no need to post-process them in anyways and they produce a nice surface finish. Yes, you can see layer lines, but they are negligible. Also, you can create nice narrow vent holes (I use 0.2 mm) which you cannot make with any other process.
Conclusion
Since I already made the molds and I found myself very happy with the result, I thought I give it a try and make some extra and make them available on my Tindie store. If you are interested, you can get one there and support me and my blog in that way. I know that casting silicone is something not everybody does at home and trust me, the silicone surface is worth it!
Also, in the spirit of sharing the knowledge with the community, I release the files for the spout and molds. You can use them under the CC BY-SA 4.0. You can find them below including the link to the license terms. If you like them, you can consider “buying me a coffee” on my Ko-fi to say thanks.
PS: If you would like to see spout for your printer, please let me know in this form. If there is enough demand, I will design it. Also, if you would like to manufacture my design on the scale, please let me know! I would like to learn about it and e.g., help you with the redesign. Just contact me via the form on https://honzamrazek.cz/.
Files:
Resin vat cleaning kit for Elegoo Saturn by Jan Mrázek is licensed under Attribution-ShareAlike 4.0 International![]()
![]()
![]()
The source files can be found here:
Note that the spout’s sides are slightly preloaded (for the silicone part) so a printed model might not fit well on the vat.
Recent news: My open letter to the 3D-printing community
I love the 3D-printing community, but I think there is room for improvement. Let's get better in 2023! Read the full letter.
Support my work!
If you like my work (these blog posts, my software and CAD models) and you would like to see more posts on various topics coming, consider supporting me in various ways:
- You can become my sponsor on Github.
- If you prefer, you can also become my Patreon.
- You can buy me a coffee on Ko-fi,
- or you can buy something from my Tindie store (also see below),
- Or you can just share my work!
If you are interested in knowing what I am up to and recent sneak-peaks, consider following me on social media (Twitter, Instagram, Facebook).
My store offers
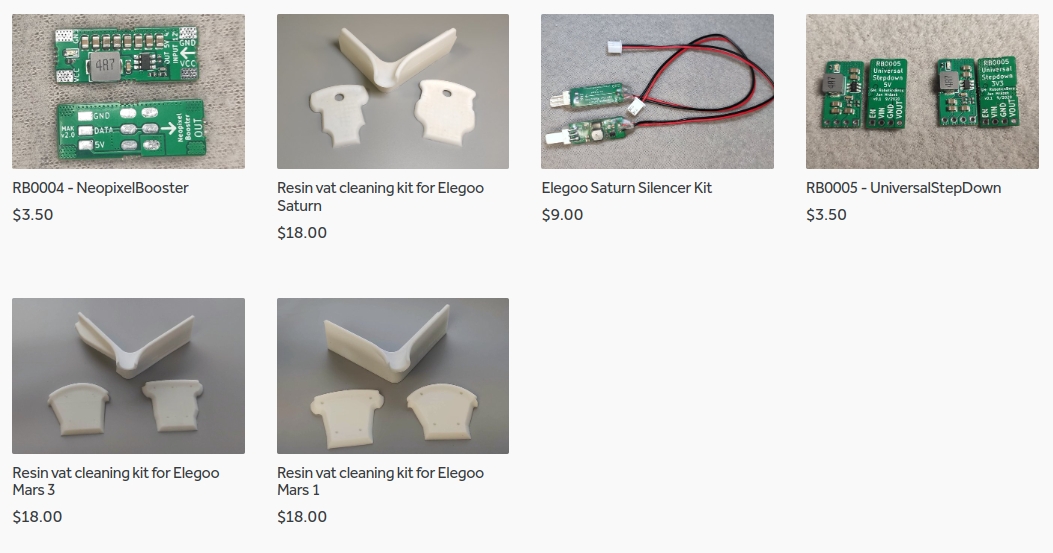
I launched new tank cleaning kits for Elegoo Saturn, Saturn S, Mars 1, and Mars 3. You can find them in my store.
many thanks for this really helpful work. i also 3d print then cast in stronger resins as i built my functional parts. i have tried so many resins but none of them gave me the strength and flexibility i need for long lasting strong parts. so casting is the solution for now. i wish i could just 3D print and use that part in my devices but i guess the cheap 3D printing technology is not there yet.
I have downloaded the STEP files and converted to STL online. i am planing to but Saturn when it will be shipped to UK next month and i also hate changing the resin from the tank, it is a messy work already and if not careful it can be really messy.
your design is amazing mate, i am hoping to print and cast mine in my own silicone at home. the idea of having core in the cast is also something new to me and it is ingenious, i am impressed with your ideas. one thing, i have noticed that the spout-core STEP file when i convert gives me a round shapes block it is not really the core, the image you have on your website. is there a mistake or did you do this intentionally to prevent people from doing their own casts? i checked your Tindie store, i wanted to but but shipping to UK is something like £9 on top of the price of £13. for a small piece it is a bit expensive with the shipment cost to be honest. if you can send me the core file that will be amazing and i will use your creation when my Saturn arrives.
Also saw your post about changing the fans in saturn to make it more silent. i love the idea, i think i will buy the step down converters from your tindie site when my saturn arrives and i get the silent fans too.
please let me know. i look forward to your creations. I m an inventor who lives in the UK. i love to create new things too. Thanks.
best Wishes,
Ahmet
Hi loved this article!! I think you might enjoy getting rid of the messy part of your project using this tool i invented. In the process of trying ti get this out there. Change materials in one liquid oz. Go from urethane to silicone to epoxy using first in first out process. Completely variable ratio change in seconds. Take a look. http://rover.ebay.com/rover/1/711-53200-19255-0/1?icep_ff3=2&pub=5575378759&campid=5338273189&customid=&icep_item=233934487480&ipn=psmain&icep_vectorid=229466&kwid=902099&mtid=824&kw=lg&toolid=11111