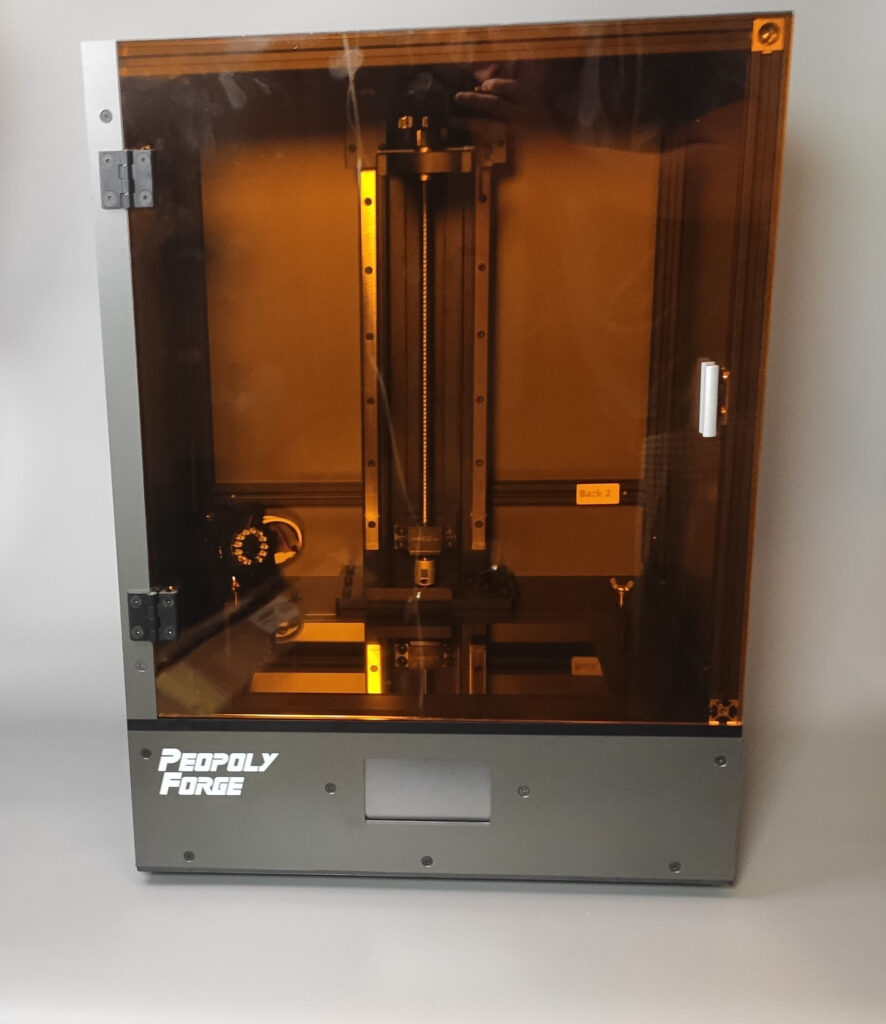
At the beginning of 2022, Peopoly announced their new Forge machine. It is a large format LCD printer (288×163×350 mm) with standard 50µm pixels. Besided large-format, the printer promises to deliver great build-quality, ability to print engineering resins reliably, convenient features and non-Chitu control solution. Partially because of my curiosity, partially to increase my production capacity, I decided to buy the printer. I’ve been using it for 2 months now. Let’s look at what I like, what I dislike and what am worried about. Does it deliver what it promises? Is the new control board good and does it solve all the problem we have with Chitu controllers? Let’s find out.
In this review, just like in my other reviews, we will look at how the machine performs. Don’t expect a traditional review when the reviewer prints a few minis and tells you that it prints nicely and basically rephrases the specs. I will only focus on my experience with the machine. I assume you have some notion about resin printers, and basically, you are just wondering if Peopoly Forge is worth the money. I use my printers to print precise functional components, we will explore the limits of the printer, and we will also look inside the printer and its construction.
Basic overview and build quality
The printer comes in two boxes. The bottom unit with LCD and control electronics is fully assembled. The top part with the Z-axis and cover is left for you to assemble. It takes about 30–45 minutes. Everything is nicely described in their manual. When I wasn’t sure about something, I emailed the support and got a response in less than an hour.
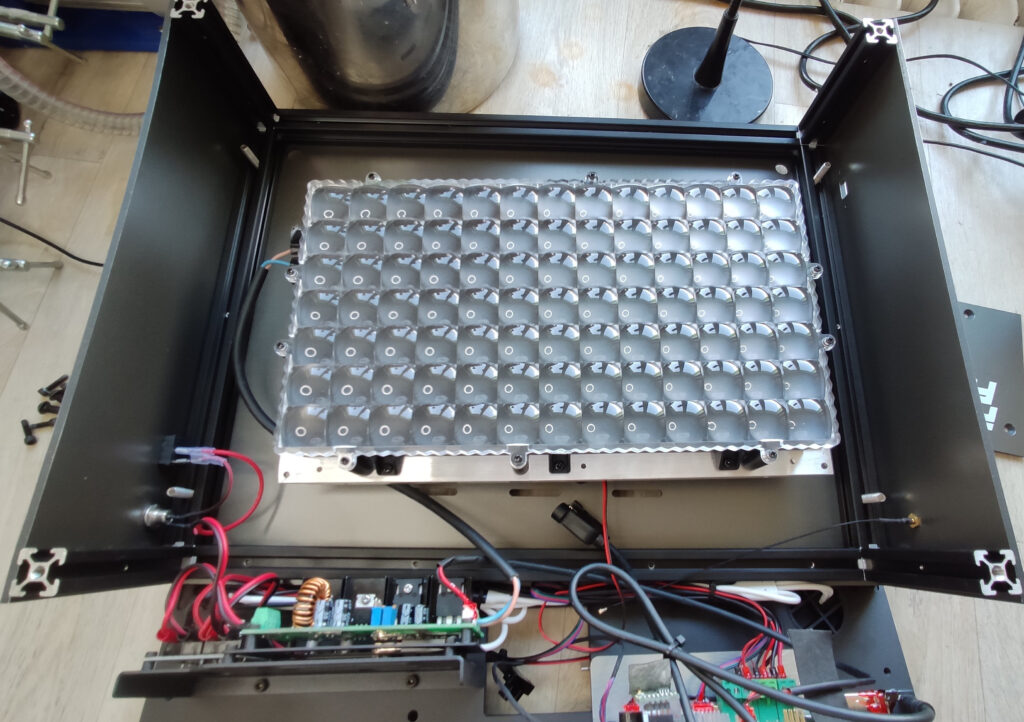
Let’s start with the bottom, fully assembled, part. It houses the LCD, LED array for backlight and control electronics with a touchscreen. There is nothing surprising. Everything is just nicely designed, big and beefy. E.g., the whole LED array is mounted on one huge heatsink. There are 91 LEDs, and each LED has its own lens, e.g., just like on Saturn 1. They are cooled by one big fan that is reasonably quiet.
Inside of the printer

LED array
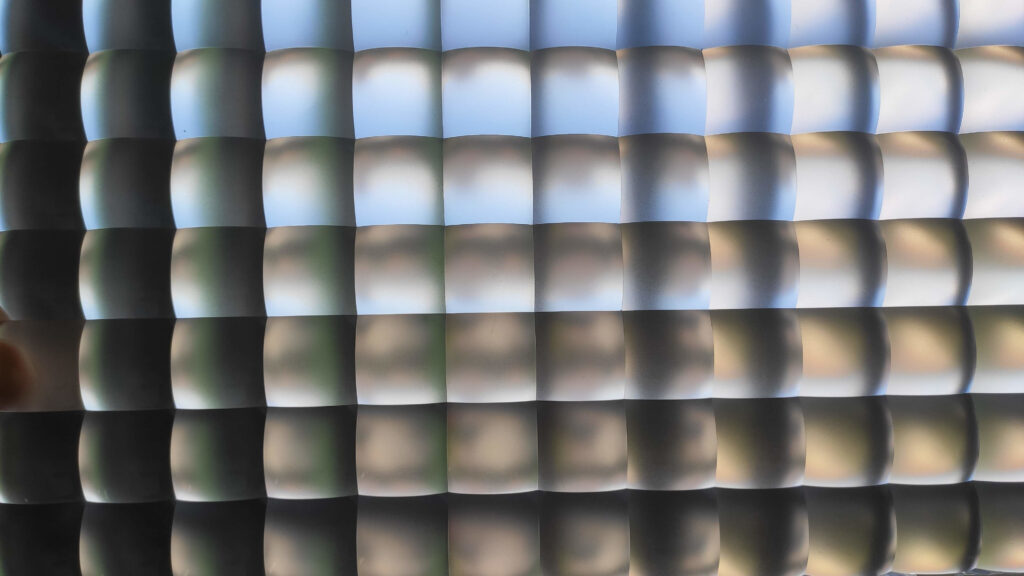
LED lenses
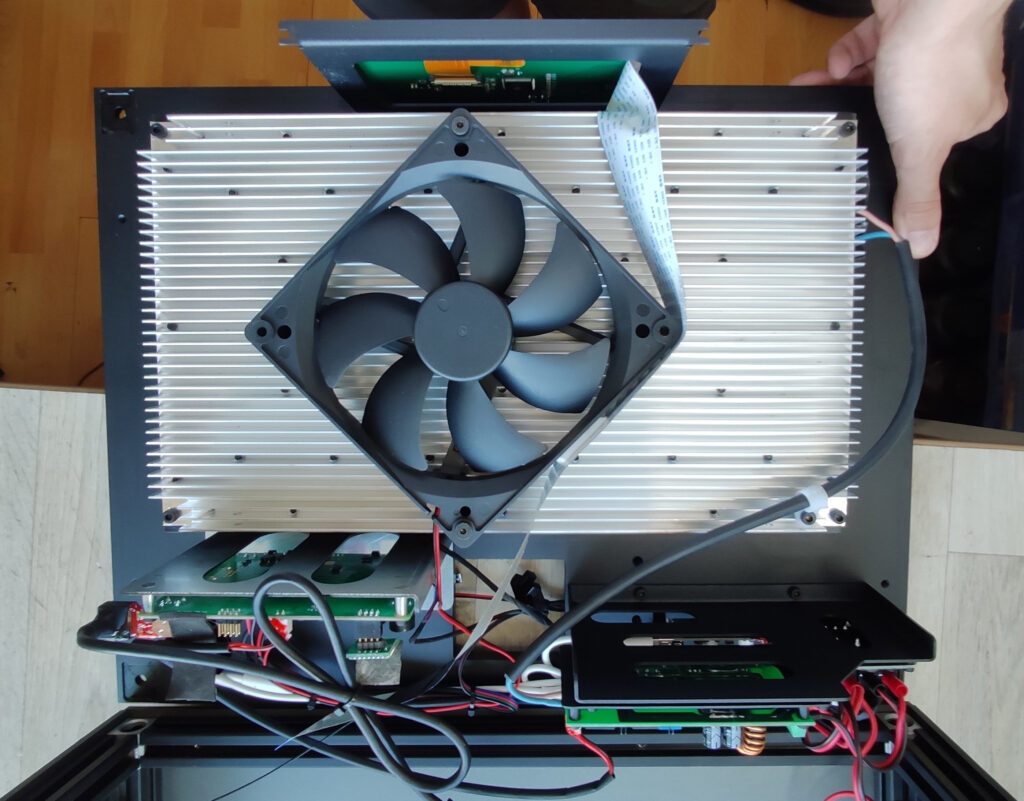
Heatsink of the LED array
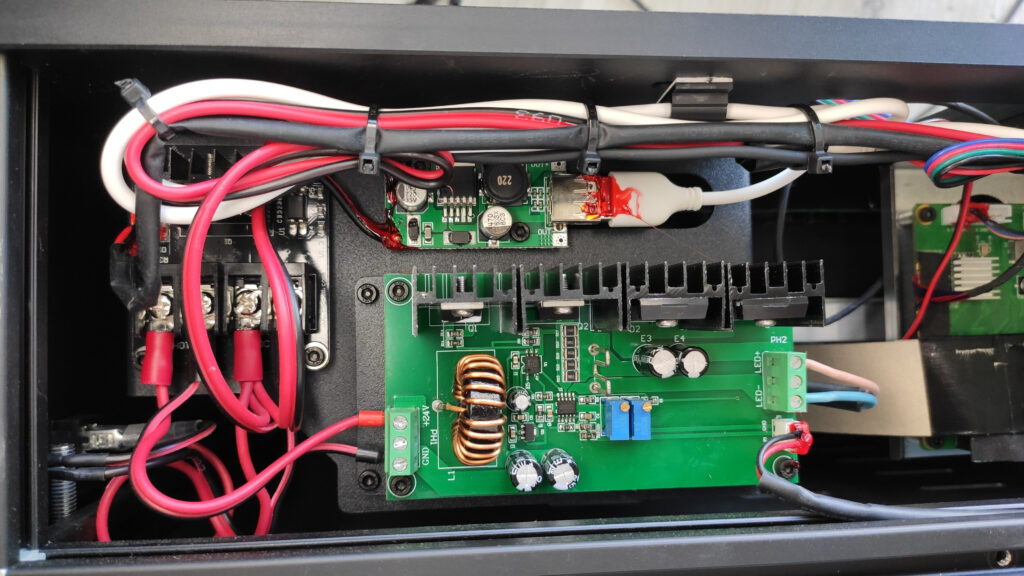
The LED driver

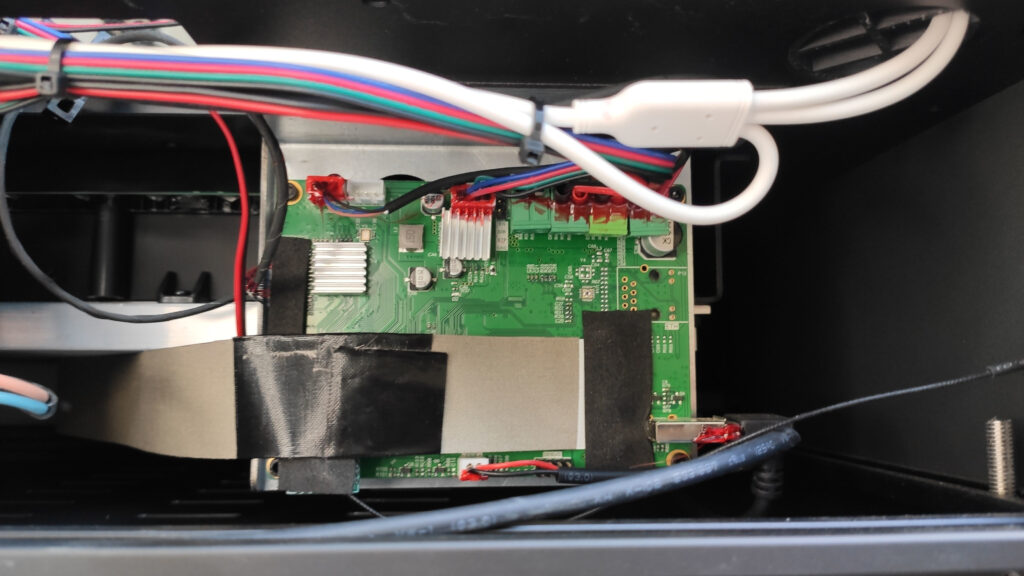
The Vlare control board
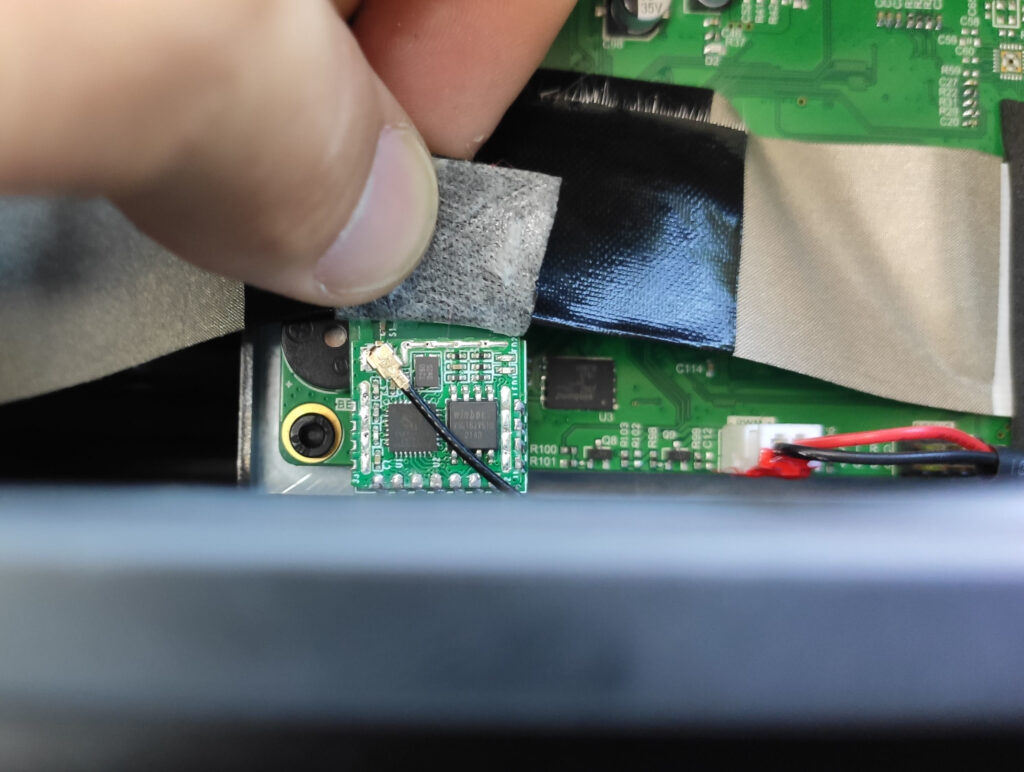
Vlare uses ESP to implement WiFI
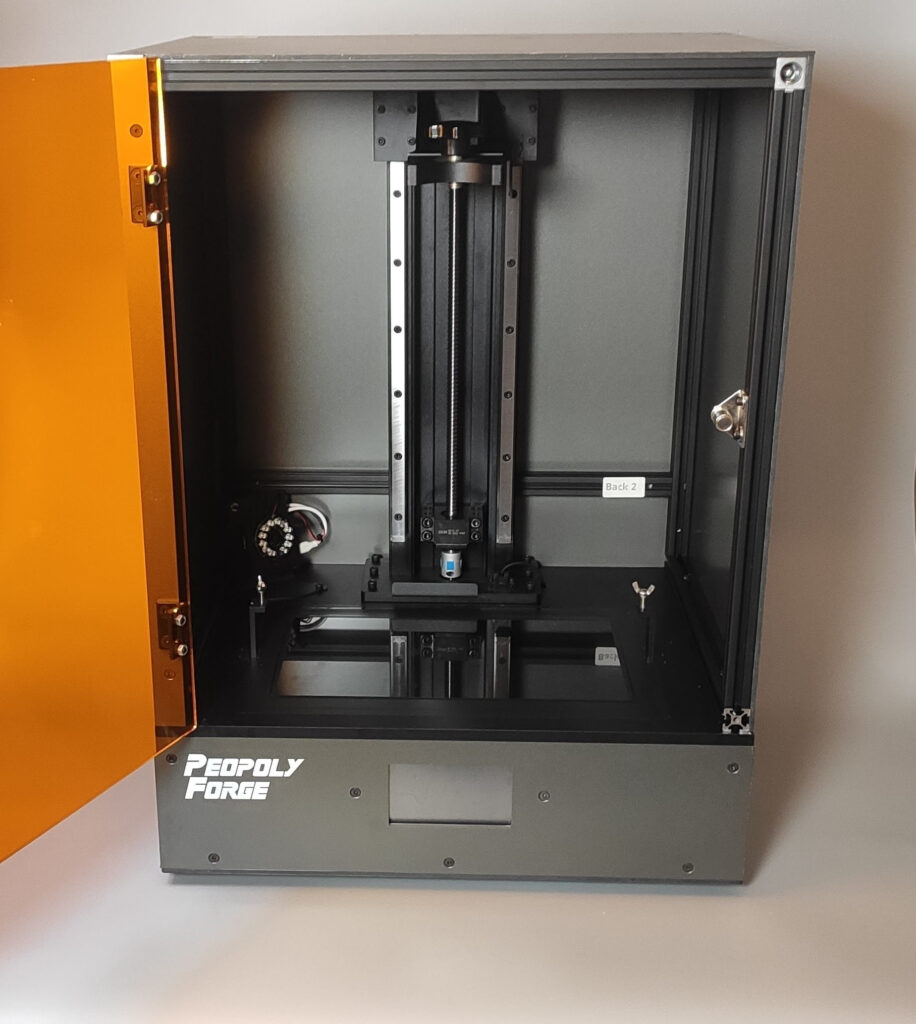
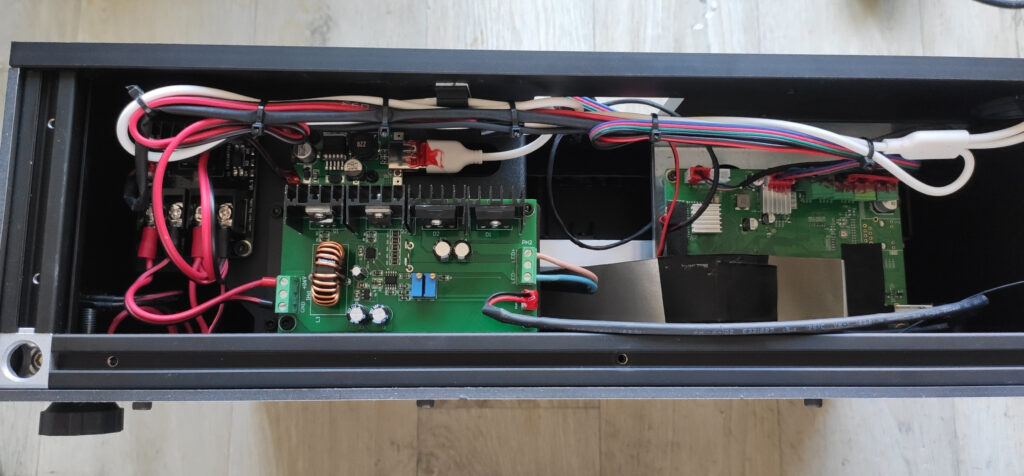
The whole printer uses standard aluminum extrusions for the construction, and the large surfaces are covered by plastic sheets screwed to the extrusions. This means that the printer doesn’t look as clean and consumer-grade like machines by other companies (e.g., Elegoo, Anycubic, or Průša). But it has a nice “industrial feeling”. The usage of the extrusion automatically makes you feel like you want to adjust the printer or mount something new. So you aren’t afraid of modifying it. To my surprise, the internals are quite empty – especially on the sides. I think that the printer could be narrower by 8 centimeters and save precious tabletop space. Or the power supply could be integrated into the body.
The printer is merely empty
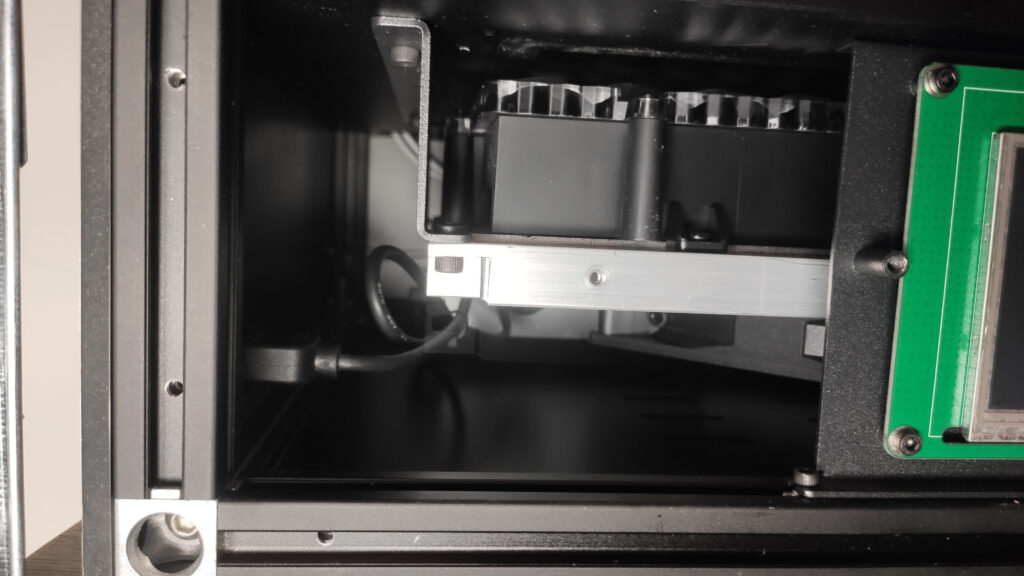
The printer is merely empty
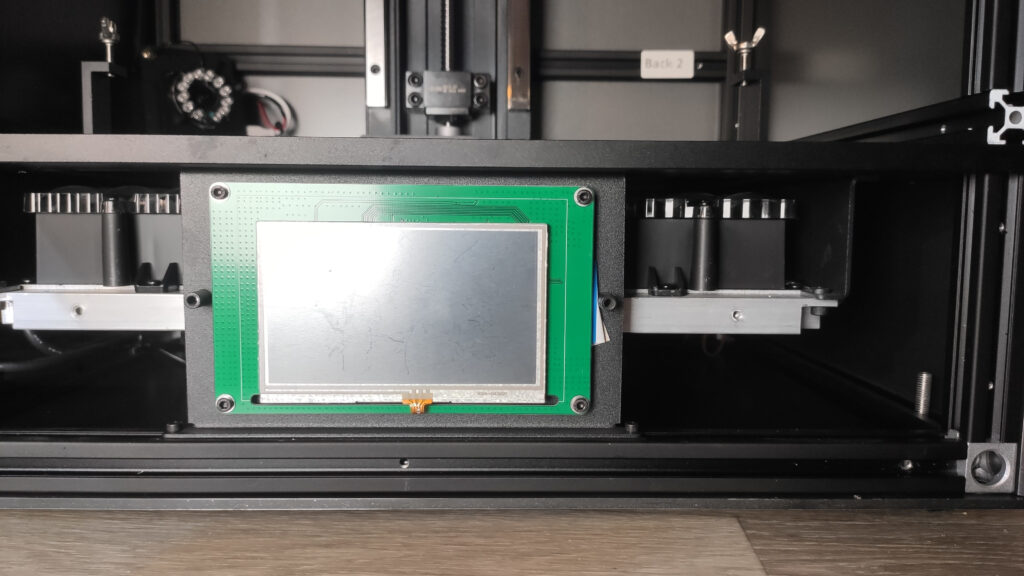
Everything important in the bottom unit is referenced to the top plate. The top plate is made out of a 13mm thick solid aluminum plate. This plate is what determines the printer’s rigidity. The plate houses the LCD, LED array, and the Z axis. The rest is just a box to cover the electronics. The LCD promises to have a contrast of 500:1. For comparison, the recently released Saturn 2 has a contrast ratio of 400:1. The high contrast should prevent light bleeding.
Regarding the electronics, you will find the standard arrangement. However, what differs from other printers on the market is that there isn’t a Chitu board. There is a Vlare control board. More about this board later on.
The printer’s cover is just a couple of extrusions forming a frame covered by plastic plates. Again – usage of the extrusions opens possibilities to mount further equipment easily. I have just one small complaint about the plastic covers; they have chamfered edges, so two boards form perfect corners. Unfortunately, the corners are really sharp. This is inconvenient when you move the machine – the machine weighs nearly 30 kg, and during the manipulation, I have managed to cut myself by the sharp corners. However, this is really cosmetic, and you won’t mind it during regular operation.
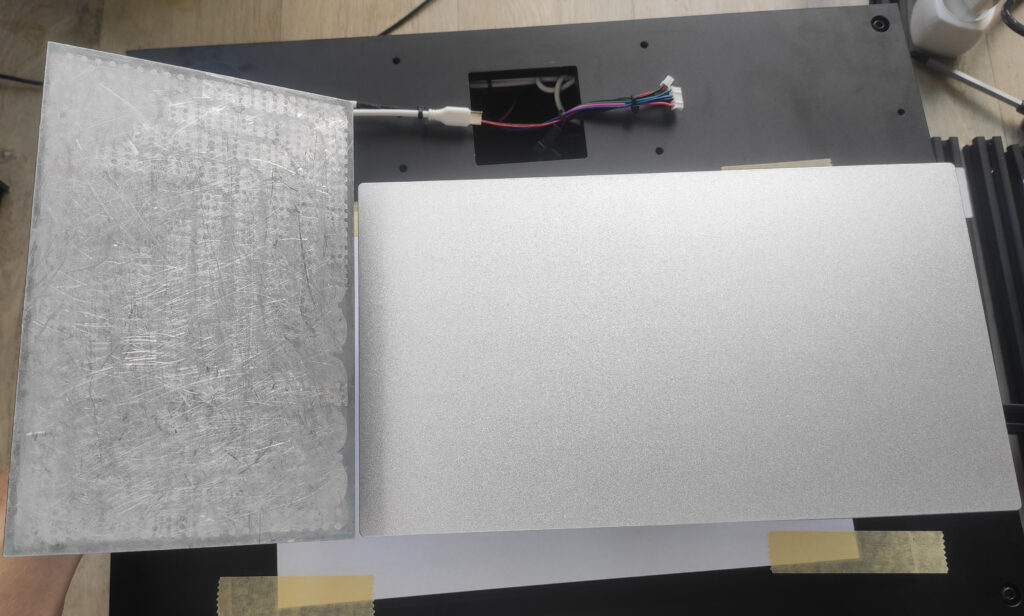
Build plate comparison with Elegoo Saturn 1
The coupling
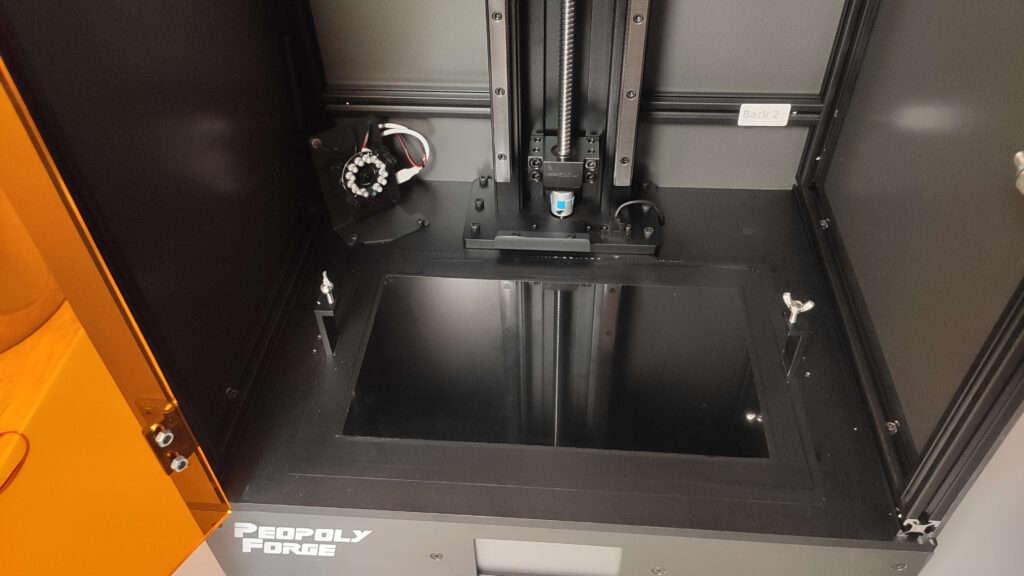
The build volume
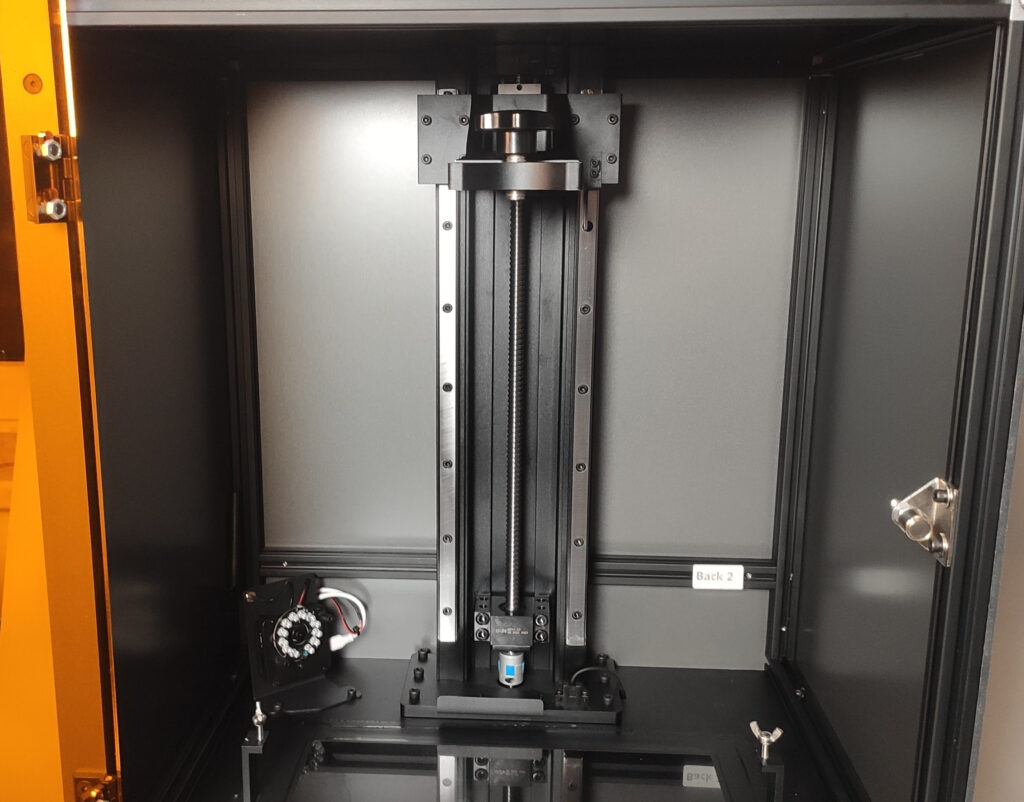
The whole Z-axis
The top part of the printer consists of just a very nicely done Z-axis that comes pre-assembled, and you just have to connect the connectors and screw it to the build plate. The whole assembly looks very rigid. It even has the smell of industrial lubricant used on the linear rails and the screw. The axis uses a ball screw with proper housing – that is a separate bearing for the screw, and the screw is coupled with the motor using a flex coupler. Since I didn’t want to disassemble this beauty, I didn’t check if the bearings are ordinary ball bearings or if they used a pair of angular-contact bearings (that would be the best option). The screw doesn’t seem to be preloaded. I was able to measure a backlash of about 15µm. Which is really great for a printer and not even comparable with lead screws. So no complaints here. Overall, the whole assembly is decently rigid. See the video below where I flex the construction by roughly 100 N. Compared to Saturn 2, where I complained about the construction, there is nothing bad I can say about this Z-axis. It flexes relatively little when I consider that the build arm is nearly 2× longer than on Saturn 2 (thus 2× the load), and I am loading it with nearly 3× the force compared to the test I performed on both my Saturns.
The resin tank is held by L-brackets. It works, but honestly, I prefer when the tank is screwed in via long screws. I like that when you want to remove it, you can lift it. In this case, you have to first slide it for the first half, and then you can lift it. Nevertheless, the tank has nicely designed handles, so it easy to manipulate. Unfortunately, the machine spout in the corner doesn’t work. Just like on any other tank, the tank gets dirty on the outside when you pour the resin out. The tanks just miss a sharp corner over which the resin cannot flow due to surface tension. Just like on my resin tank spouts.
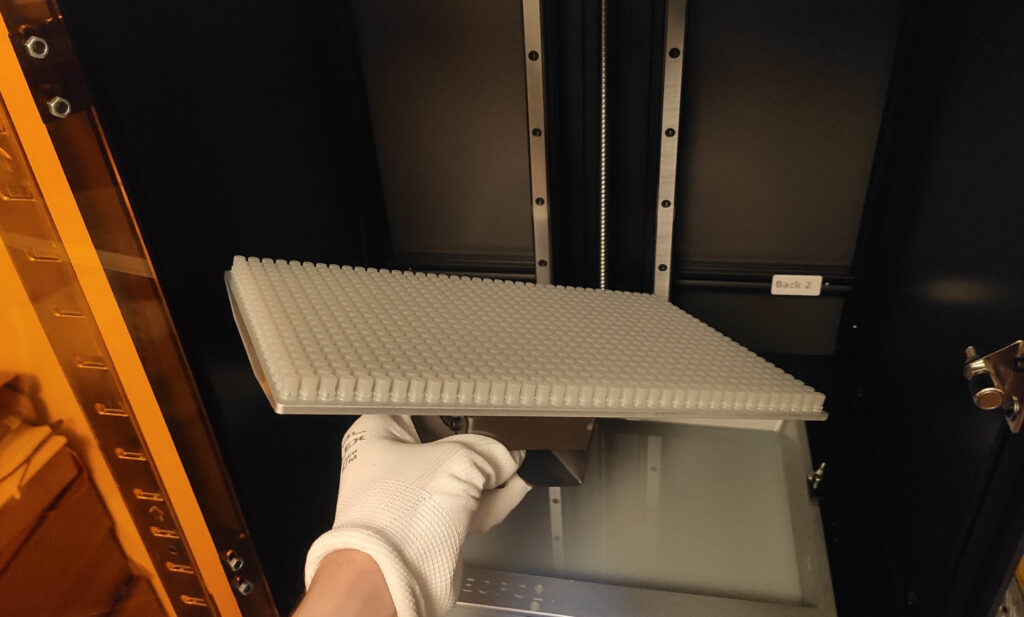
The build plate is solid without holes to relieve resistance when sinking into the resin. This is fine as the construction is rigid enough to handle the resistance. The solid build plate is, therefore, easy to clean, and you can print flat on the build plate. I had zero adhesion problems with the build plate. The build plate hangs from the Z-axis arm using a metal bracket. This means that the build plate doesn’t have such a convenient handle like Elegoo’s printers. This isn’t a huge problem, but it would be nice to have some more convenient way of holding the build plate.
The extra features
Besides great build quality, large build volume, and non-Chitu control solution, the printer promises two interesting features: a heated resin tank and a built-in camera to watch the print remotely.
Heated resin tank
The resin tank has a built-in heater inside its walls. The printer comes with an extra power supply and a temperature controller for the resin tank. Having a constant temperature during printing is quite important.
- First, when the resin is cold, it is thick, less reactive, and causes problems with layer adhesion. Keeping the resin warm saves you the trouble.
- Since resin reactivity changes with temperature, temperature changes might lead to dimensional inaccuracies. If you eliminate the temperature factor by having the temperature the same all the time, you will save a lot of trouble when achieving tight tolerances.
- If you print from tough resins, e.g., Siraya Tech Blu, Fast Mecha, and similar, it is nearly a must to keep the resin warm, so it is thinner. If you keep it cold, you will suffer from blooming.
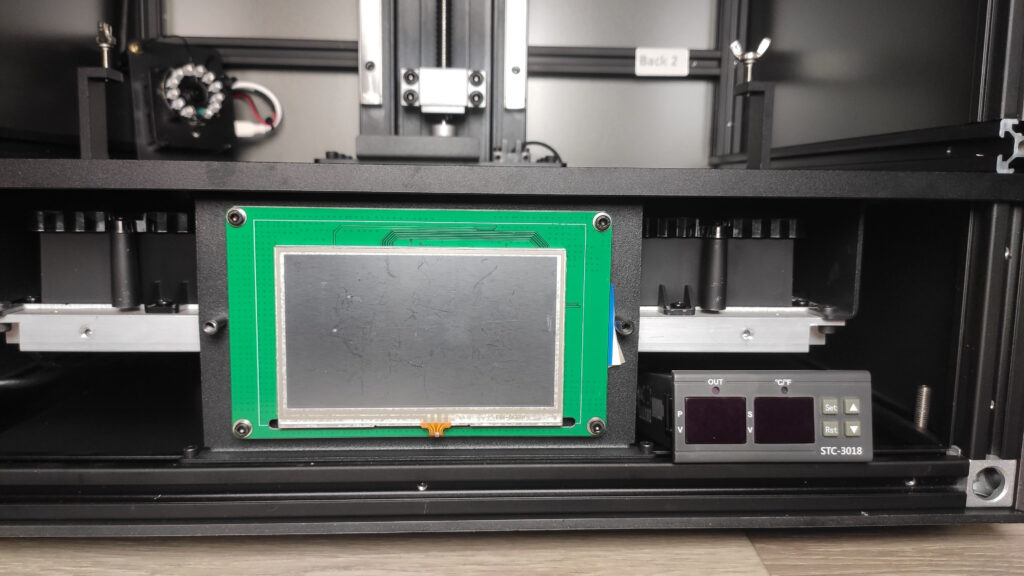
Many people build custom heaters; here, you get one in the package. The control unit is powered by the STC-3018 controller. Overall the solution works perfectly. I didn’t have a single problem with it. You don’t heat the air, just the resin. You should turn it on about 20-30 minutes before printing, so the resin has time to heat up.
I only have two minor complaints about the solution. The first one is that it is a completely separate solution (separate controller, separate power supply). I understand that this allows for modularity, but when I have a printer in a constrained space, I have nowhere to put the unit. I don’t mind a separate solution, but I would appreciate at least housing of the controller inside the printer and powering it from the same power supply. The second complaint is that they use a USB connector for connecting the resin tank to the controller. I understand that the connector is nice, but I generally dislike misusing well-established connectors. At least they used a USB-A plug on the active part, so none will damage a flash drive by this (just like it is possible due to a bad design by Elegoo on Saturn 2), and none will probably connect the controller to a computer.
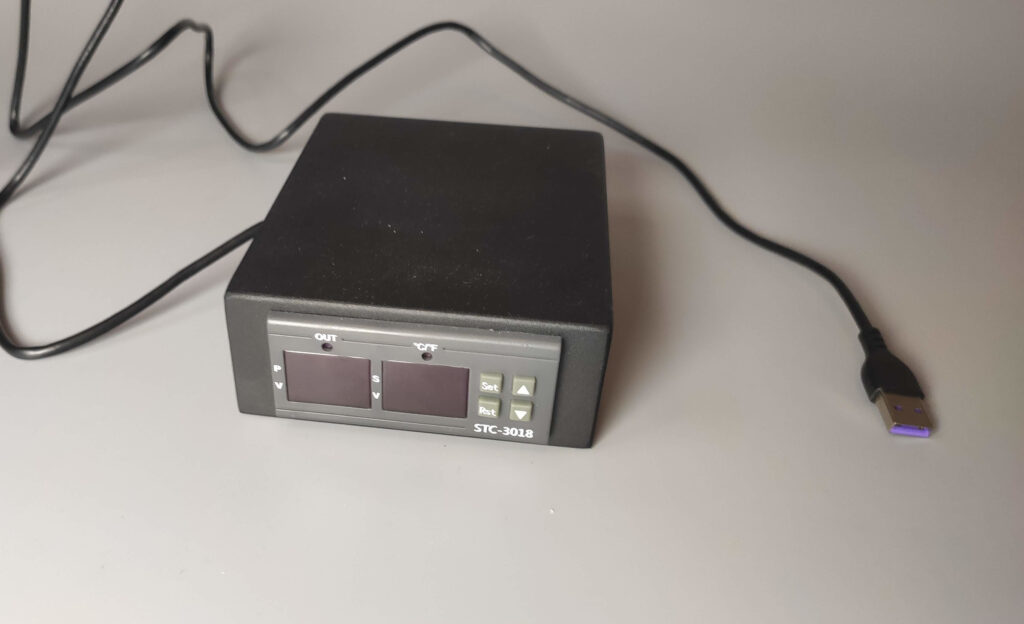
The temperature controller
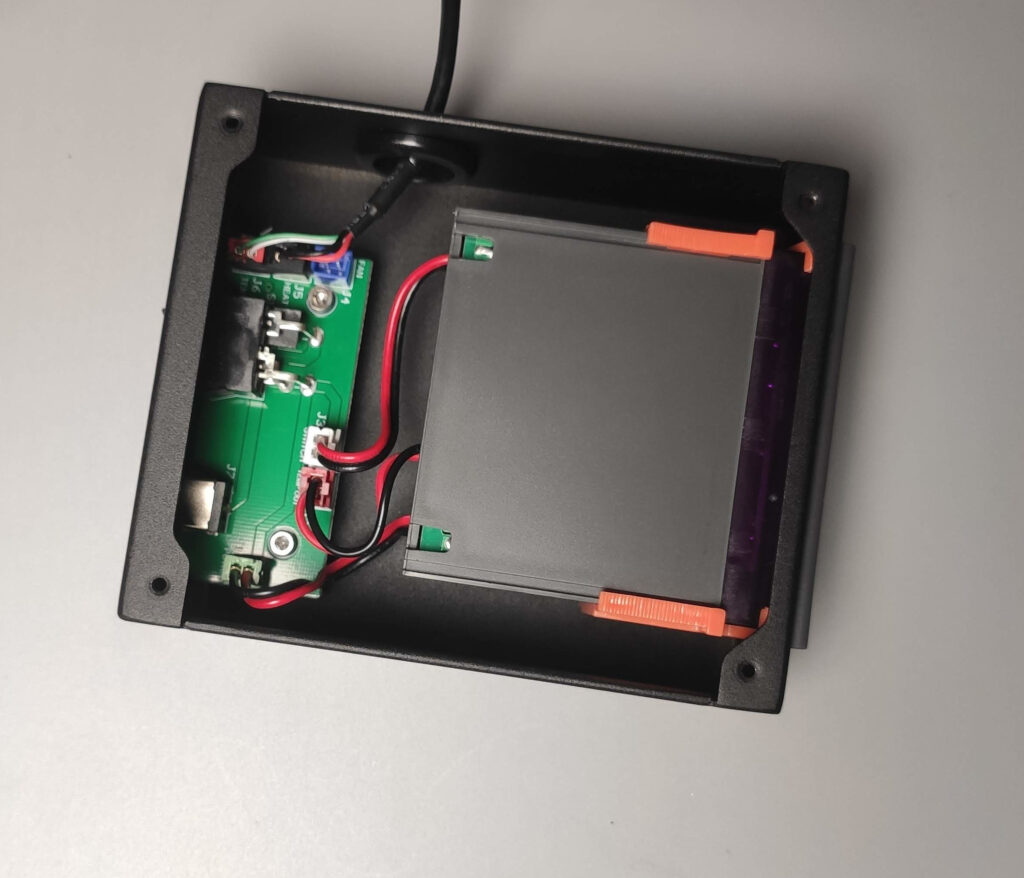
Inside of the controller.
Hm, the controller fits iside. It isn't the most symmetrical placement...
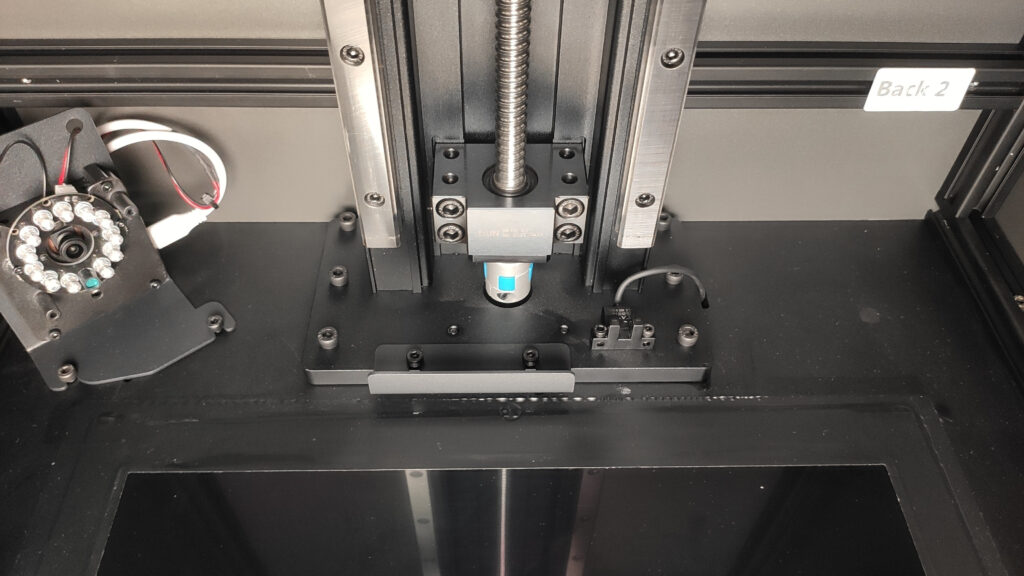
Built-in camera
Forge comes with a camera mounted in the corner that allows you to watch the print. What is nice is that the camera can sense IR, and it has an IR illumination ring around it so you can watch the print at night. Again, the camera is a completely stand-alone solution, just like the heated tank, and it is not integrated into the printer’s controller.
The camera is based on ESP32, which connects to your WiFi network and serves a web page that you use to view the image. Optionally, you can use a supplied software. The camera quality isn’t astonishing and you won’t be using it for taking time-lapses, but it serves well the purpose of quickly checking if the printed model is being printed fine or if it failed.
I am a little disappointed that there is no Linux support for the camera, and to configure it, you have to use a Mac or Windows application. The support referred me to a command set I can use to configure it manually via serial line, but I haven’t succeeded (the camera wasn’t saving the configuration).
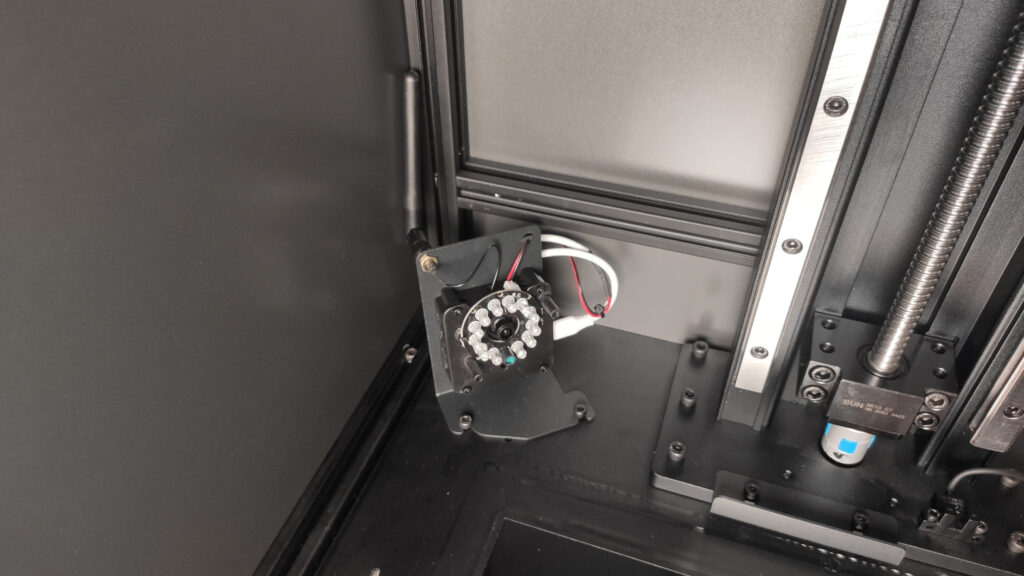
The camera
Print quality
Just like I say in nearly every review – most resin printers can print nicely, and there isn’t much point in showing you photos of common models. The question is what you have to do to get nice-looking prints (e.g., how much you have to read my blog to get perfect models).
The test print that came on the flash drive
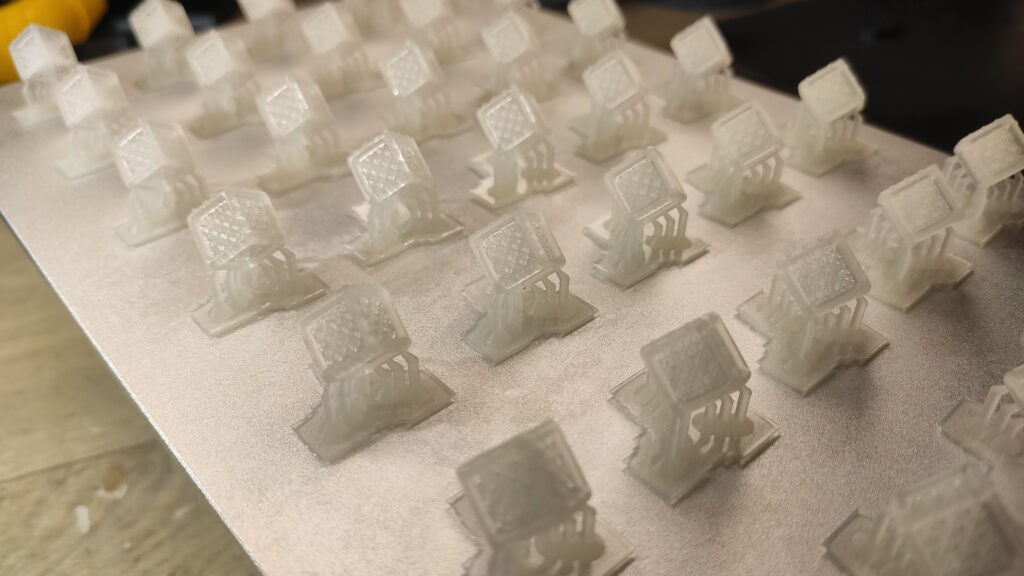
The test print that came on the flash drive
Detail 1
Detail 2
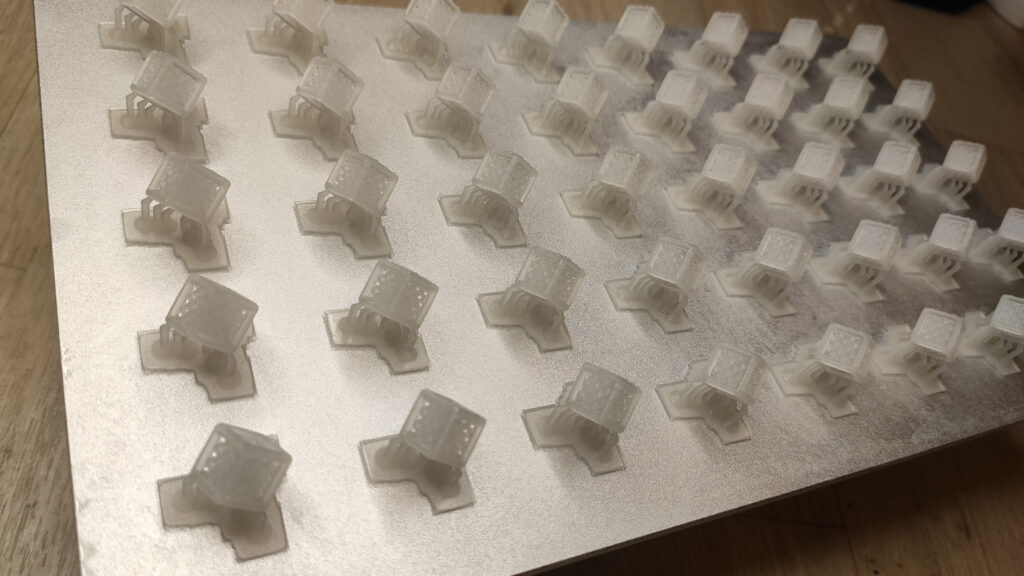
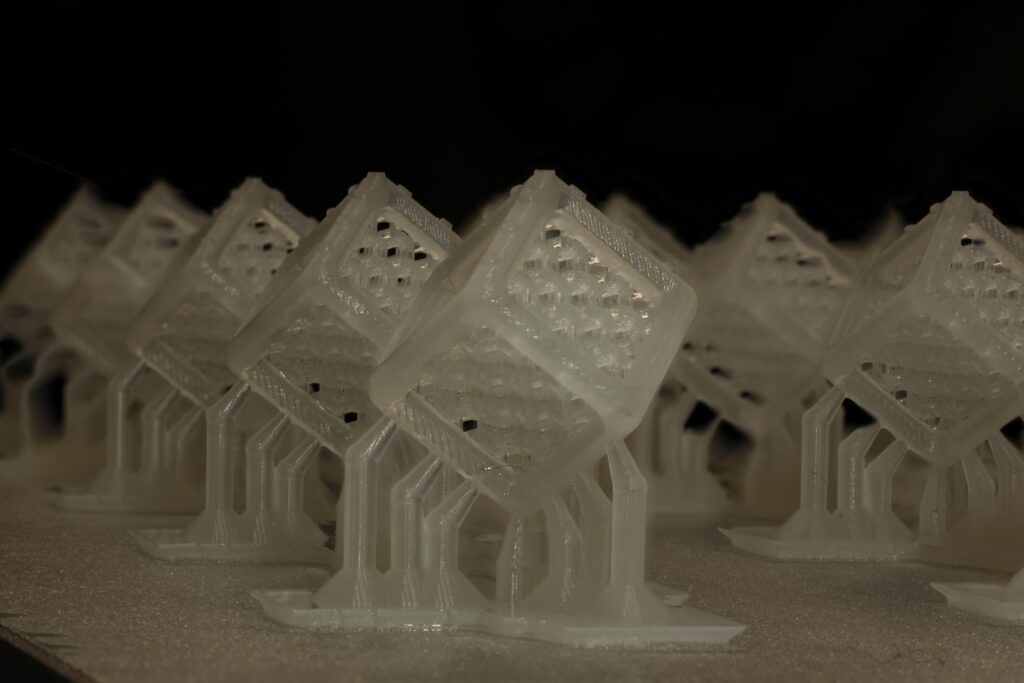
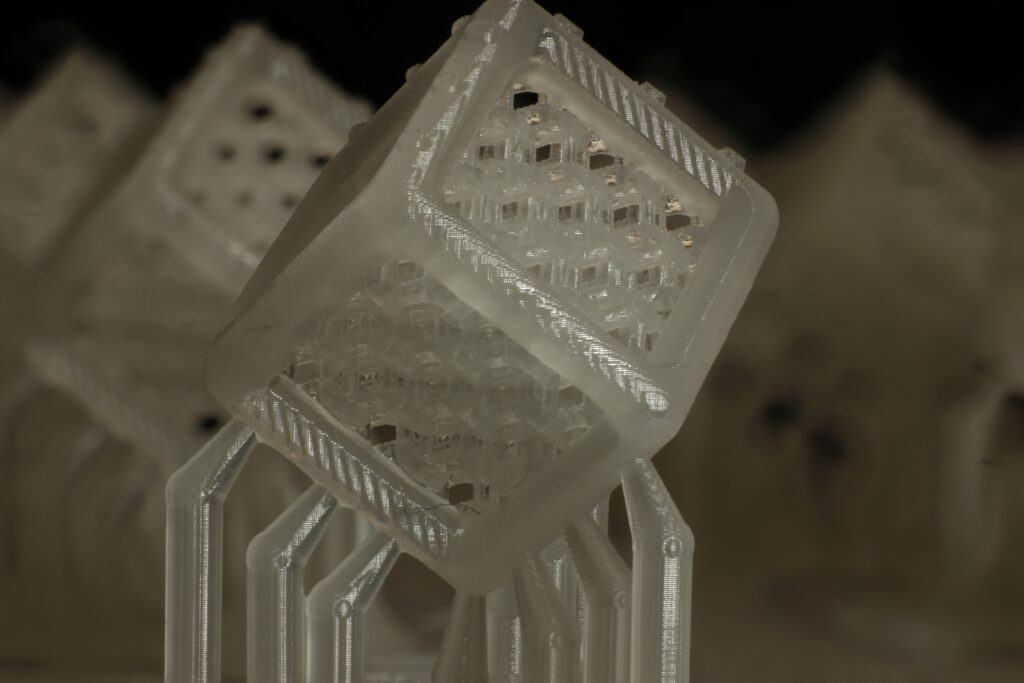
The positive fact is that there’s not much you have to do to get nice prints from Forge. Due to the rigid construction and heated resin tank, it doesn’t suffer from blooming, and there isn’t a big elephant foot. Also, due to constant temperature and overall great build quality, there isn’t a problem with repeatability. If you have a working sliced model, you just press run, and everything turns out just like it did before, and before, and before. I can say that Forge is a great workhorse in this regard.

It is wonderful, that I am printing the same build plate every other week and the result is still the same
It is wonderful, that I am printing the same build plate every other week and the result is still the same
I haven’t been able to verify if the high-contrast panel indeed prevents from overgrowing the prints. I haven’t performed enough experiments to have a conclusion, though. Preliminarily, I can say that I think overgrowing and crispiness depend more on the resin used and temperature than the contrast ratio of the panel. I also cannot judge if the panel has a bigger effect than the quality of the backlight, so I make no conclusions here. I can just say – the panel seems flawless.
The printer works fine with the default profile in Vlare slicer. However, I consider this profile rather conservative. It prints nicely but slowly. I was able to use much more aggressive peeling and sinking without worse quality, thus getting the same results in a shorter time. I think this is something that Peopoly is aware of, as they just last week released a blog post showing more aggressive profiles. Overall, 40 mm per hour is possible.
The Vlare control board & ecosystem
The Vlare control board is why many people were considering this printer. Why? Let me start with a context. Most of the printers are powered by Chitu board. They are pretty dominant on the market, and I dare to say they have a mere-monopoly. However, not only that Chitu boards used to be buggy, feature undocumented behavior and have a limited feature set. Chitu tries to ensure its dominance in the market by encrypting the files with user-sliced models. Therefore only the printers and software they approve can decode them. This is something that I am not excited about. Also, the whole solution is closed as much as possible, it doesn’t much tweaking. So it is not hacker and maker friendly just like the controller of FDM printer. Nevertheless, Chitu has a working ecosystem, and there are some workarounds for the known limitations, and we can somehow use it.
Vlare claims that they want to change this. They want to be open and allow you for “unlimited printing,” and they encourage innovation. Pretty exciting, right?
Hardware-wise Vlare seems to follow the same architecture as Chitu. That is, the control board features a microcontroller (presumably Cortex-M) and FPGA with a frame buffer that drives the LCD. Additionally, the board has onboard storage (you don’t need a flash drive), and you can upload sliced files over WiFi. This architecture allows for low cost but forces you to use a format that can be easily manipulated on the limited computation power of a small microcontroller. Their format is open – they provide a format specification on their website. Everything is there, but I wouldn’t claim it is presented in the most convenient way possible.
The format more-less resembles Chitu format. It is a binary format that assumes a fixed layer printing cycle. The image data are RLE encoded. By fixed layer printing cycle, I mean that the printer assumes that every layer starts by lowering, possibly waiting, exposing supports, exposing the model, and lifting. You cannot change this. Therefore, the format describes layers. Note that at the moment, their slicer generates files with the extension “VLR” for Peopoly Forge. This format seems to differ from the open format specified on the website. It, unfortunately, means that it cannot be further processed. However, you can export the open format from their slicer, but you lose some features.
The Forge’s format allows for two cool features: motion ramping is fine-tunable, and it allows for two exposure patterns per layer. Their slicer uses it to expose supports more than the model.
However, unlike Chitu they don’t support per-layer settings. Also, Chitu format seems to support unlimited exposure patterns per layer (as their Pro slicer can generate that, however, I am unsure if UVTools support it). That means that most of the techniques I developed to improve resin printing (e.g, cross-section-aware rest times to prevent blooming and elephant foot) cannot be used. UVTools support Vlare open format, but it is useful only for altering the image data as anything else isn’t supported by the format. Unfortunately, UVTools doesn’t support the VRL format. In the context of Forge, it doesn’t matter that much as Forge can overcome the limitations through its well-built hardware; however, it is not ideal, and I hope we can get the format specification and make it editable. Note that you can still eliminate the elephant foot by adding rest times to all layers/all base layers. It works, but you print slower than you might.
The UI of the printer is very similar to the Chitu UI. I would even call them the exact replicas. On the other hand, the Chitu UI works just fine, so there aren’t many reasons to change. However, some similarities are strange – the printer beeps at the same moment as Chitu printers, and the sliced files in Vlare slicer have the prefix “_”. That makes me wonder if the control firmware has a common origin (some open-source project I am not aware of?) or if Vlare just didn’t want to reinvent the wheel and inspired a lot. Sometimes you can note a small graphical glitch in the UI (e.g., a text larger than the message box), but that is something that can be easily addressed in future firmware updates.
Vlare also develops a custom slicer. The slicer promises to have advanced features that only other paid slicers offer. Such as boolean operation, adding text, and more. I haven’t tested these features much (as I prefer to prepare my models in software that is designed for such purposes) I guess it can come in handy for people needing to add a text or a base to a miniature. Overall, Vlare Slicer is easy to control. What I was pleased about is that it supports the loading of STEP models. Also, the auto generator of supports seems to be working just fine. It doesn’t allow for precision control just like the Formware slicer does, but I rarely have a need for special support placement. If you don’t like Vlare slicer, you can use Lychee slicer that supports Vlare format (though, in the current release Peopoly Forge profile is missing, and I haven’t tested the support myself).
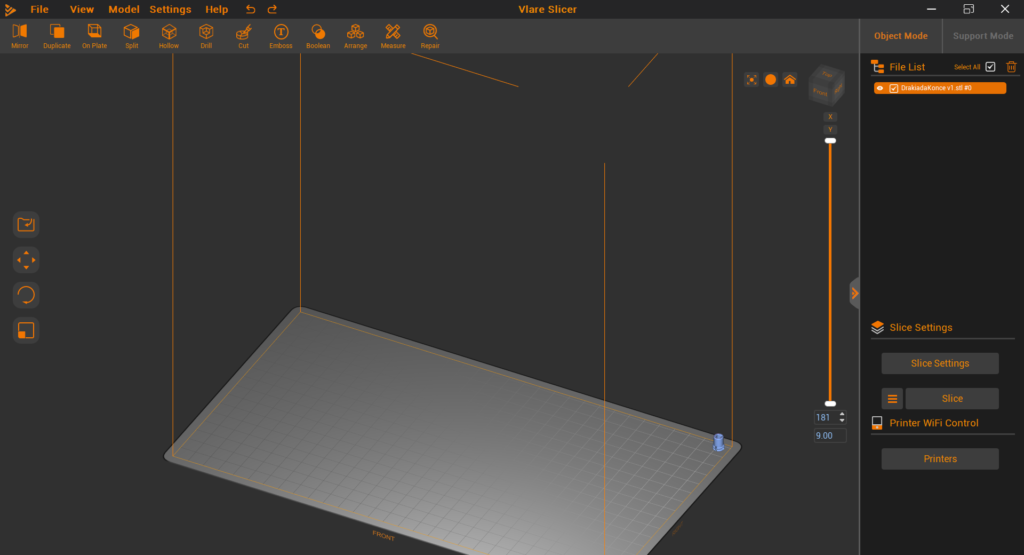
Vlare slicer
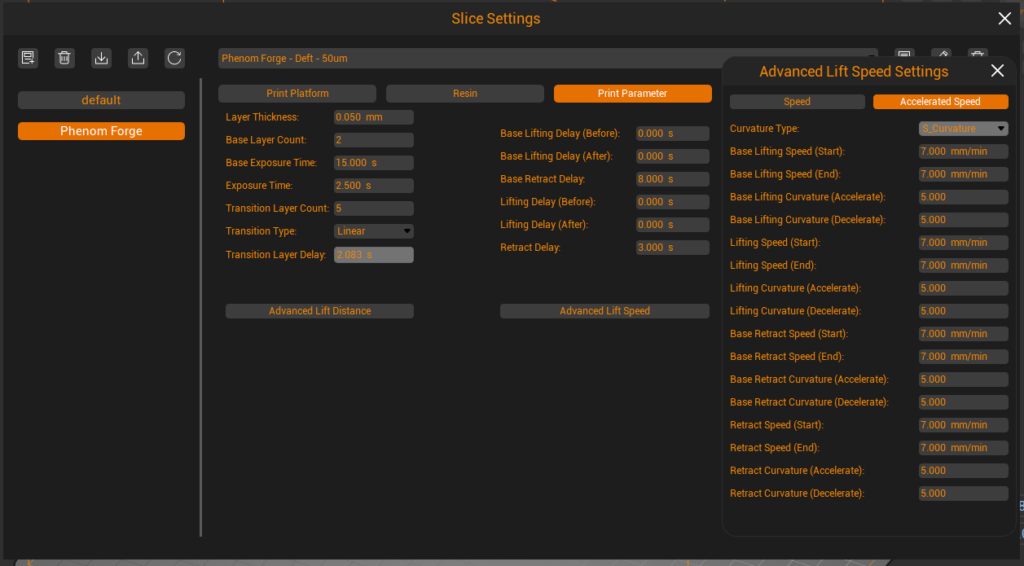
All the option you can set
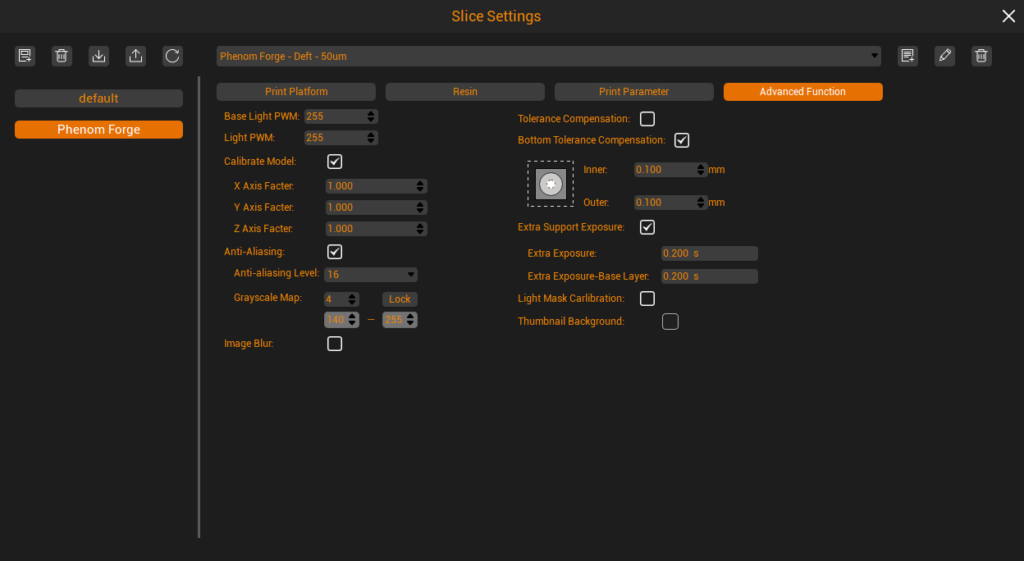
All the option you can set
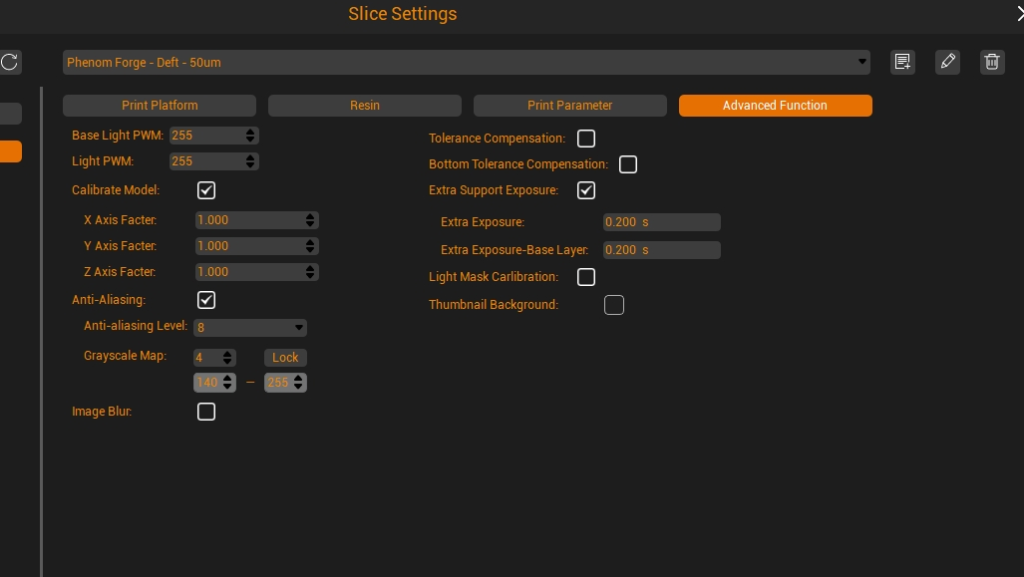
All the option you can set
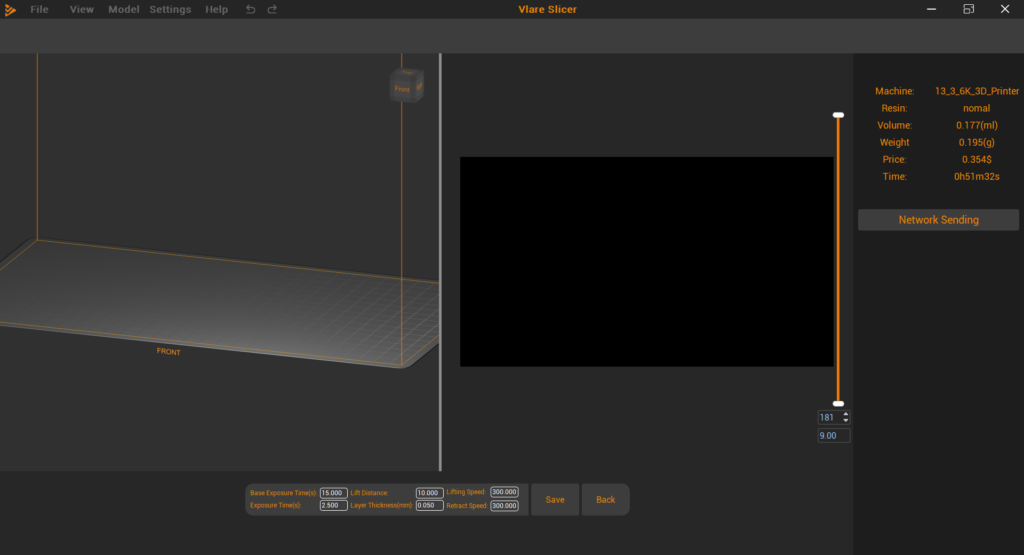
The export view in the slicer
Is Vlare the solution we have been waiting for?
Unfortunately, I don’t think so. It is a decent replacement for Chitu boards. It works, and the slicer is also decent. You won’t make a mistake by getting a Vlare-powered printer if you don’t care about using UVTools post-processing and advanced techniques. But I think it doesn’t bring much innovation, nor is it a solution open to innovations. There are a couple of reasons why I think so:
- First of all, the format is simple, without many useful features. It is hard to develop new printing innovations when the format doesn’t allow us to change the printing cycle. Also, having a second undocumented format is, well, a Chitu-like move, which raises some trust concerns with this company.
- The whole solution is closed. There are no connectors for sensors. Even when there would be pins on the control board to, e.g., connect my peel force sensor, I have no way of integrating it into the control board. Similarly, I would like to integrate temperature control into the printer. I want to handle resin temperature automatically when I start the print.
- Zero Linux support. Vlare Slicer work on Windows and MacOS. It doesn’t work under Wine. The developer team doesn’t plan to support Linux, not even through Wine. Most of the power community that often drives innovation uses Linux. This just discourages them from even trying to bring innovation.
- Poor communication. Vlare has a Discord server “to ask questions and build community”. However, most questions and suggestions are never answered. So, no improvement over Chitu.
Therefore, in my eyes, Vlare is a decent replacement for Chitu that gives you a solid slicer and working control solution. But in my opinion, they don’t make the right steps to “drive the innovation” in resin printing.
I tried to propose two solutions directly to Vlare to address this, but none of them was heard:
- Have a public issue tracker. At the moment, you have no clear way to report discovered bugs. There will probably be a Discord channel to report bugs in the future. However, I, and most power users, would appreciate a real public issue tracker (e.g., Github, Gitlab, Bugzilla, etc.). When we give the energy and time into a bug description or a feature proposal, we want to see the progress, get e-mail notifications and actually monitor what Vlare implement and what they don’t. Writing bug reports on a Discord channel is unfriendly, discouraging me from proposing features and reporting bugs.
- Give up on a better file format, and turn your control board into a dumb LCD and motor controller controlled by a third-party entity. I understand that Vlare keeps the solution closed as they need to make money. However, this prevents innovation. They have know-how in driving LCDs. Keep that. Gives us a simple protocol over UART that will allow us to move with the printer and instruct your board to show images from a flash drive on the screen. Sell these boards. We will build innovative solutions, and you could still sell plenty of boards because we cannot drive high-resolution screens.
Back to Forge – is it a good printer? Should I buy it?
Overall, I am excited about Forge. It is a reliable workhorse. It can print fast, nicely, and most importantly, reliably. It has a nice industrial feeling. It just delivers what you need. I wouldn’t call it a beginner-friendly printer as it needs to be assembled, a large format can cost you a lot of money in the case of failed prints, and there are not so many tutorials on the Vlare ecosystem. However, if you are an experienced resin printer user, you will enjoy using it.
I would appreciate it if the heater and camera were more tightly integrated into the printer. I would also appreciate it if the front doors would come with a seal to prevent leaking resin smell. Those are just details that don’t spoil the overall good impression.
The Vlare control system is a tremendous disappointment for me. It doesn’t deliver the innovation and openness I expected (as they claim on their website). If you want to leverage UVTools post-processing, you will have to use the OVF format, and you cannot use per-layer settings. But I want to be an optimist, and I hope we can eventually get the VLR format specification and thus, make it editable and make the Vlare control solution as use usable as Chitu solutions. However, I have some serious doubts that it will become a more advanced solution than Chitu. Overall, it is not a dealbreaker for me, and the Vlare solution doesn’t kill the printer.
Peopoly Forge is a good machine, but you have to pay for the quality and performance it delivers. If you are looking for a reliable machine, I think it is money well spent. If you plan to print only a couple of minis per year, I think you will be much happier with a cheaper printer.
Recent news: My open letter to the 3D-printing community
I love the 3D-printing community, but I think there is room for improvement. Let's get better in 2023! Read the full letter.
Support my work!
If you like my work (these blog posts, my software and CAD models) and you would like to see more posts on various topics coming, consider supporting me in various ways:
- You can become my sponsor on Github.
- If you prefer, you can also become my Patreon.
- You can buy me a coffee on Ko-fi,
- or you can buy something from my Tindie store (also see below),
- Or you can just share my work!
If you are interested in knowing what I am up to and recent sneak-peaks, consider following me on social media (Twitter, Instagram, Facebook).
My store offers
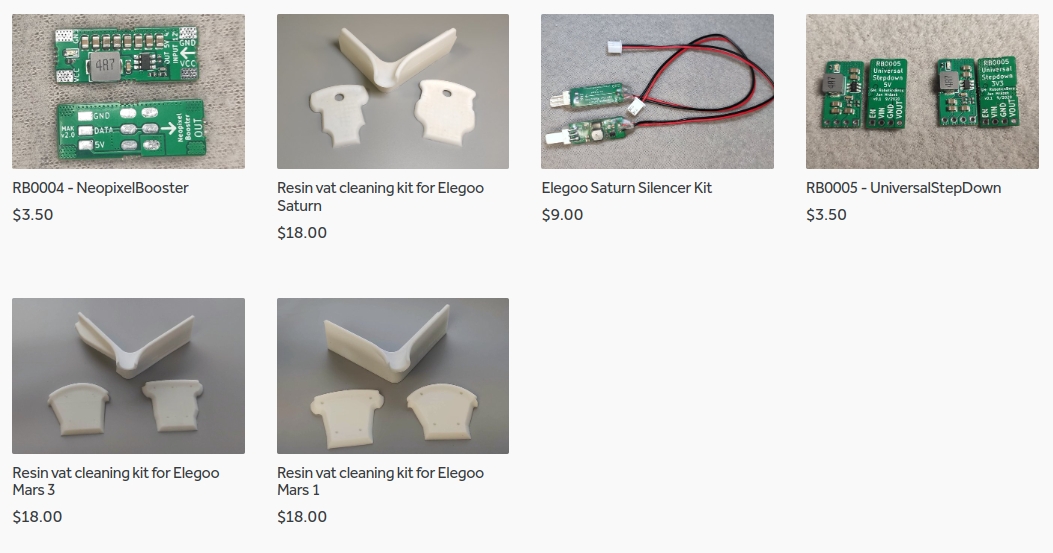
I launched new tank cleaning kits for Elegoo Saturn, Saturn S, Mars 1, and Mars 3. You can find them in my store.
Great Job. Have you tried Origin One DLP Printer Before?
If you mean Stratasys Origin One, then the answer is no – the printer costs nearly 100k USD, which is out of my budget.
Excellent review! way better than all those basic YT videos that are only showing roughly few prints
I’m not impressed by this printed, it looks like an overpriced of copy the excellent open-source Prometheus MSLA 3D Printer https://github.com/TheContrappostoShop/Prometheus-MSLA
I’m amazed to see how easy it is to sell a piece of poorly engineered hardware for $1499. I’m an engineer, new to 3D printing world but it seems that there is definitely room for well-engineered, high capacity and affordable resin printer <$999
Sorry for the repost it seems something went wrong on the previous post
Excellent review! way better than all those basic YT videos that are only showing roughly few prints
I’m not impressed by this printer, it looks like an overpriced copy of the excellent open-source Prometheus MSLA 3D Printer https://github.com/TheContrappostoShop/Prometheus-MSLA
I’m amazed to see how easy it is to sell a piece of poorly engineered hardware for $1499. I’m an engineer, new to the 3D printing world but it seems that there is definitely room for well-engineered, high capacity and affordable resin printer <$999
Thanks for the kind words about the review. However, I have to disagree with you about “Forge being a copy of Prometheus”. I watch Prometheus development closely, and besides both using Al extrusion as main construction material (which is frankly, quite common) there are not much similarities. Everything is different.