After 5 months, there is a new release of KiKit. If you don’t know KiKit, it is a tool that automates several tasks in a standard KiCAD workflow like panelization, exporting manufacturing data, handling multi-board projects, or building presentation pages.
Besides many bug fixes and small performance improvements, there is a number of new features added. Thus I decided to put them in a blog post as there’s quite a lot to discuss for a standard release note. Let’s look at them.
If you don’t have time to read the whole post and you are a regular KiKit user, I suggest scrolling through the examples pages – there are many new examples.
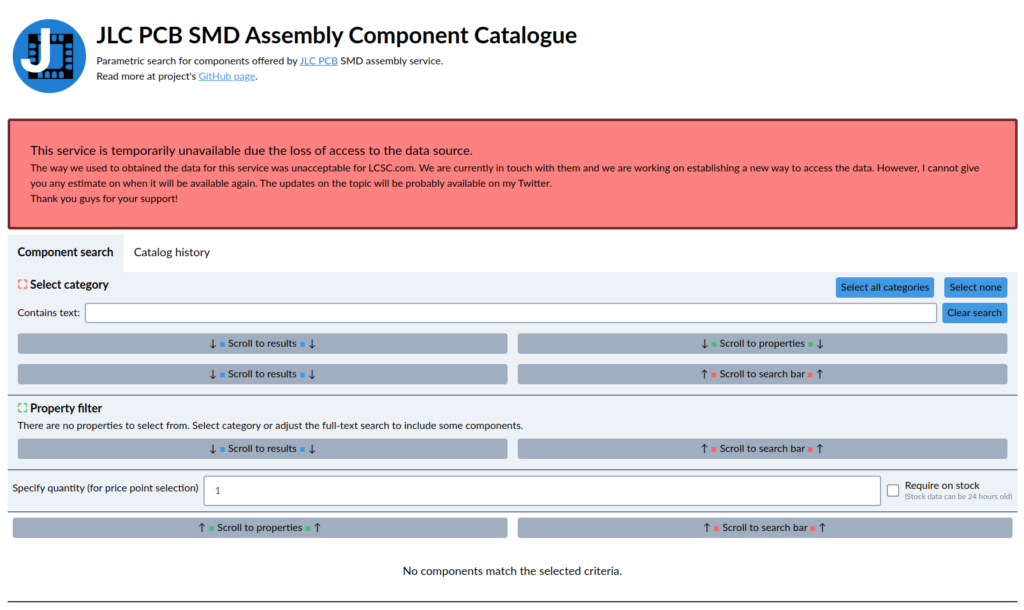
About 2 years ago I started a small and dirty project – a new catalog for the search engine for the components that JLC PCB provides for their assembly service. The motivation was really personal — I liked the dirt-cheap assembly service, but finding the suitable components for my projects was really painful. So I created JLCParts – a browser-only alternative component catalog that doesn’t need any sophisticated backed. It is just served as a static page.
However, on March 7 2022 I was forced to shut down the service. As of today, March 21 2022 it is back operational and working again. What happened? Who to blame? TLDR: Blame no one; the whole shutdown thing is just a misfortunate result of miscommunication and my service operating in a pretty dark grey area of what is legal. There was no bad faith from JLC PCB nor LCSC, just poor communication. Details below.
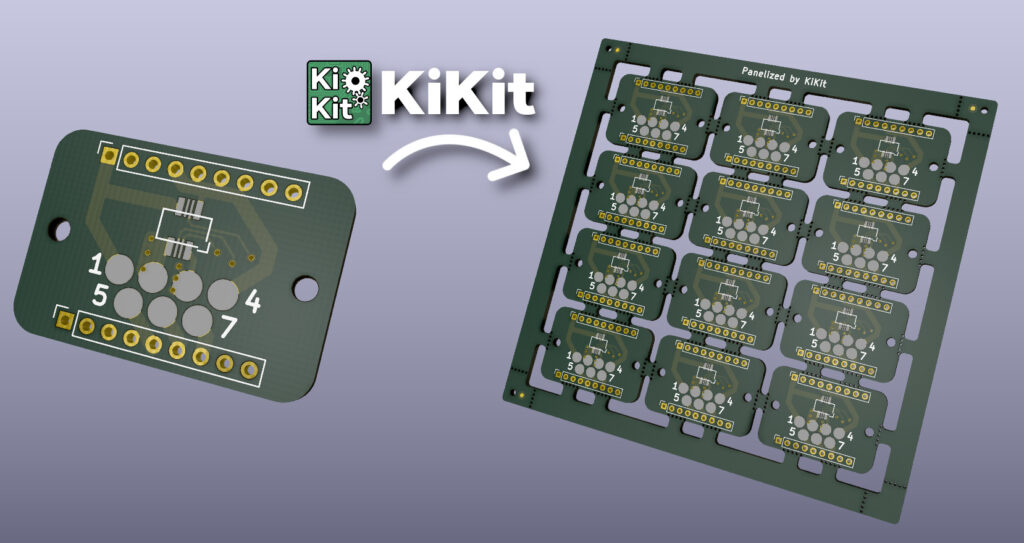
After half a year I finally released version 1.0 of KiKit. You might ask – what is KiKit? KiKit is a tool for automation of the manufacturing process of your boards designed in KiCAD. It makes the process fully automatic, repeatable and less error-prone. It basically allows you to:
Create panels of your boards (without any limitations on board shape). You just run a command and that’s it. No more hand-drawing of panels!
You can quickly export files for manufacturing. KiKit comes with presets for various manufacturers, so you just invoke a command and you get the correct settings for gerbers, it can also export BOM and POS files according to the manufacturer specs. It can also check DRC for you and it does not generate any files in such a case. Therefore you never submit faulty gebers for manufacturing.
It can also export stencils – either files for manufacturing of steel stencils or it can export a 3D model of a stencil that you can 3D print.
You can automatically run DRC in CI hooked in your repository – in that case you will be notified via e-mail, that you committed something, that does breaks the board.
KiKit also simplifies some parts of the workflow, where KiCAD struggles – e.g., batch hiding of references or multi-board projects.
They work quite well, there is all the information and they look nice. However, they work only when you have pins on two sides of the PCB and once you squeeze too much information in it, the diagram becomes hard to follow. Also, I sometimes struggle with finding the right pin when I connect duponts to my boards — there is simply too much information presented at once.
Therefore, I created Pinion — a simple tool that will take your KiCAD board and builds a nice-looking interactive diagram. You can either present them or embed them into your websites like this:
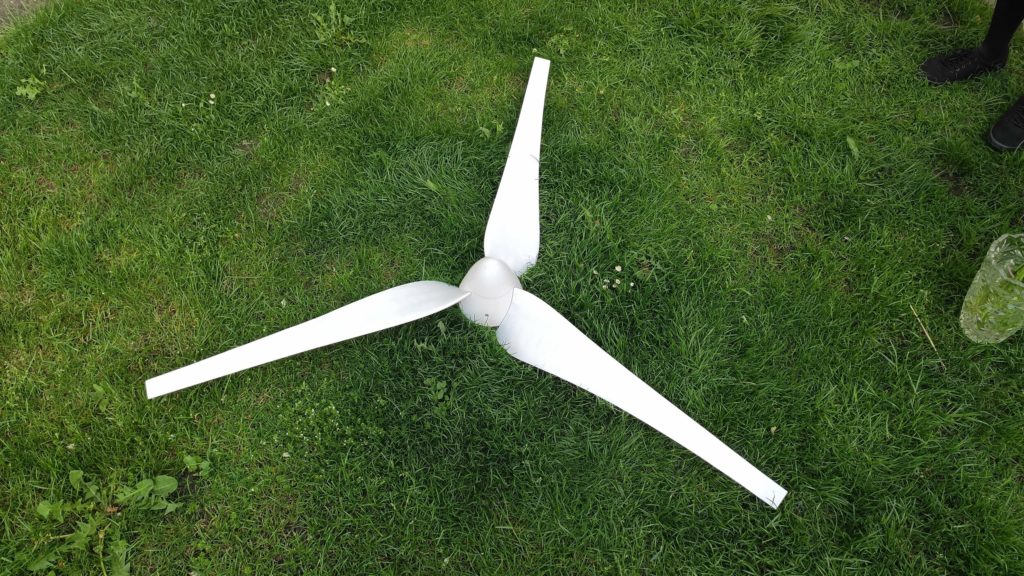
Back in high school, I wrote SOČ (student-paper) about designing and building a small horizontal wind turbine (available here, only in Czech). It was an interesting experience and I learned a lot about aerodynamic. Ten years passed and I decided to revisit the idea of having a small DIY wind turbine. However, with a modern spin on it in the form of 3D printing the whole full-scale turbine on an SLA printer. Spoiler: it turned out perfectly!
I use my beloved 3D printers Elegoo Saturn and Mars to produce various functional components. However, resin is usually not the ideal material for me as I need stronger, less brittle or flexible components. Therefore, most of the time I print molds and cast my components either out of polyurethane or silicone.
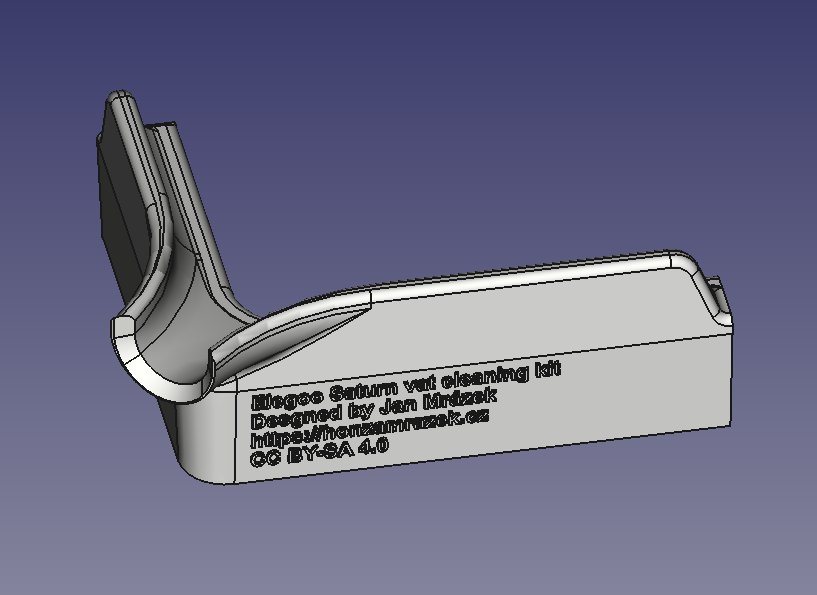
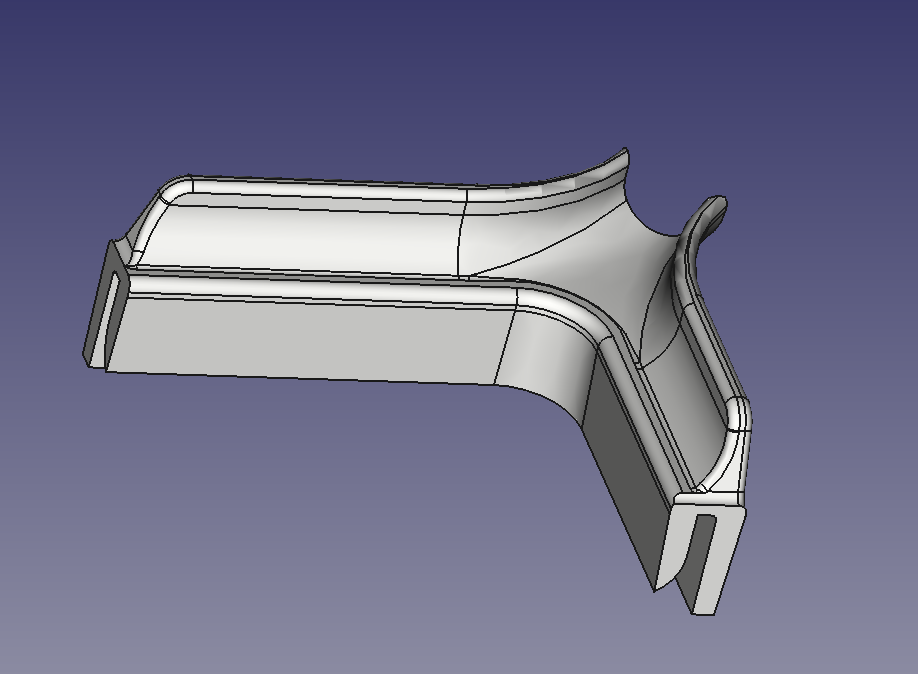
Let me show you the easier of the two – silicone molding – in this post. I will demonstrate it on piece I designed last week – the cleaning kit for Elegoo Saturn’s resin vat.
The component
Swapping resins is not a pleasant experience. Evertyhing that touches resin becomes sticky and potentially iritating for your skin. On Mars, I bought multiple 6 vats and avoided swapping resins if possible. However, Saturn vats are not available for purchase yet.
The design of the vats is not ideal for pouring – it does not feature a single sharp pouring edge which does not drop. Instead, if you pour the resin, it will flow on the outside walls of the vat, making it messy. So there is the obvious solution – let’s attach a spout that will direct the resin and also, it will feature a sharp pouring corner that does not allow the resin to flow on the walls.
Let’s start with a disclaimer: This is a one afternoon project, without a lot of planning, made only from home-available supplies.
As I wrote in the previous article, I organized a night game for K-SCUK 2016 few weeks ago. The message of the game was clear — nothing complicated, just “wow”. To accomplish this task, I wanted a stage with technical gadget. The idea of the Morse Thing was born.
Let’s start with a disclaimer: This is a 4-day project, without a lot of planning, made only from home-available supplies.
I’ve been helping to hold K-SCUK (a week long outdoor seminar for high school students interested in informatics and biology) for few years now. This year was no exception. I was put in charge of the night game, which was supposed to uncover some information about K-SCUK background story. I decided to go for a simple game with “wow effect” instead of a game with sophisticated rules and deeper message. I wanted a simple and enjoyable experience for the contestants. To accomplish that, we prepared linear route in a forest with several stops featuring a simple task (a cipher for example). This alone wouldn’t be enough to provide a memorable “wow” experience.